Carrara Marble Epoxy Countertop Kit
Product Information
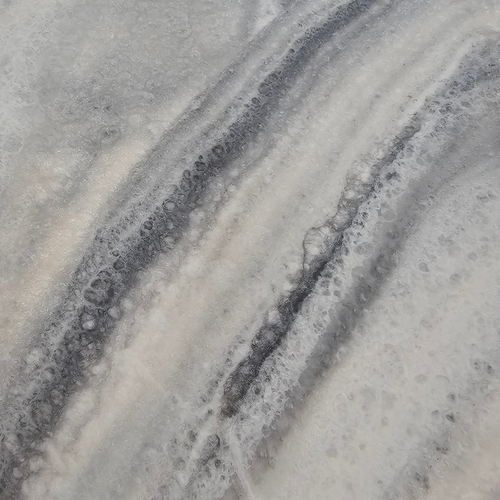
Elevate your countertops with the luxurious White Carrara Marble transformation using Stone Coat Epoxy's best-selling Carrera Marble Epoxy Countertop Kit. Designed for kitchen and bathroom renovations, our user-friendly formula helps you effortlessly achieve a sophisticated white marble look. Follow our comprehensive step-by-step instructions on the Stone Coat Countertops YouTube channel for expert guidance.
Featuring the exceptional UV resistance of our Art Coat Epoxy, our complete kit ensures long-lasting color vibrancy for your countertops. Rest easy knowing that all our products are 100% VOC-free and proudly manufactured in the USA, reflecting our unwavering commitment to quality and safety. Discover the perfect blend of style and durability for your countertops today!
Carrara Marble Kit Coverage Rates:
- 1/2-gallon covers 10 square feet
- 1-gallon covers 20 square feet
- 2-gallon covers 40 square feet
- 4-gallon covers 80 square feet
Kit Contents:
- Stone Coat's Art Coat Epoxy in 1/2, 1, 2, or 4 gallons, offering ultra UV resistance
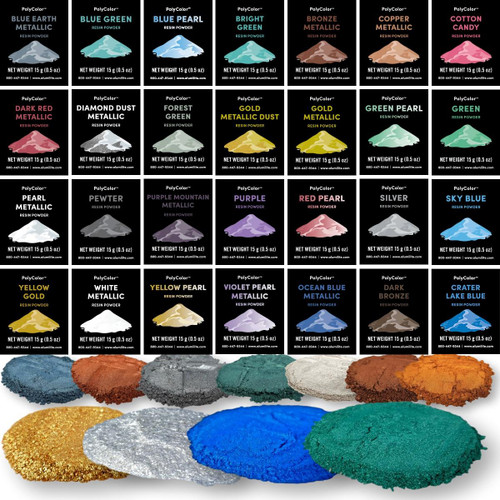
- 1 Polycolor in White
- 1 Polycolor in Black
- 1 Alumilite Dye in White
- 1 Epoxy Undercoat in White
Achieve enduring elegance and a stunning countertop finish with Stone Coat Epoxy's White Carrara Marble Kit. Shop now for an unmatched epoxy experience and guaranteed satisfaction.
** 4 Gallon Kit contains two Epoxy Undercoats & 2 of every additive **
Optional add on - Stone Coat's Ultimate Top Coat for maximum durability
Why You Should Consider Epoxy Instead of Marble
Let’s get one thing straight: Carrara marble is beautiful! Its polished white tones and subtle gray veins look great in any interior designer’s dream home. That goes for other Italian marbles, too, like Calacatta and Statuario, too.
But despite its elegance, marble has its downsides. For example:
- Marble is expensive. Carrara marble is popular because it’s one of the cheapest types of marble. However, it still costs a minimum of $40 per square foot. And that doesn’t include installation!
- Marble is soft. It’s actually a very compressed version of limestone, which makes it porous and prone to chips, cracks, and scratches.
- Acidic foods can “etch” marble. Things like tomato or lemon juice get dissolve small portions of marble, creating a rough, bumpy look.
- Marble is difficult to maintain. It must be cleaned constantly or risk staining. Cleaning agents must not be harsh. And experts recommend sealing marble countertops every 3–6 months!
Its high price, difficulty to maintain, and generally finnicky nature makes it a poor choice for high-use areas. Kitchen countertops, foyer floors, and backsplashes will quickly show wear.
Fortunately, there’s a way to get all the looks and effect of marble with none of the downsides. We’ve used epoxy to make expensive Carrara marble on a budget. Plus, it’s so easy to work with that DIYers and hobbyists can do it at home!
FAQs About Marble and Epoxy
We’ve helped countless people create beautiful, durable countertops, floors, and more from epoxy. But we’ve also helped them decide whether they’d be better served by marble or other natural stone.
We want to help you, too! Here are a few of the most common questions we hear about marble and epoxy:
- Is Carrara marble good for kitchen countertops? If you clean often and don’t use your kitchen hard, yes. However, countertops are high-use areas and are prone to spills, impacts, and other things that often damage marble.
- Is Carrara marble natural stone? That’s part of what drives up the cost, but it’s also what contributes to its almost unmistakable lustre. However,
- How can I make my countertops look like marble? Many things can look like Carrara marble. For example, some granites and quartzes, epoxy, laminate, and even white concrete all look similar. However, only epoxy and laminate are on the affordable end.
- Is Carrara marble expensive? It costs about a minimum of $40 per square foot at the low end, and that doesn’t include installation. In contrast, epoxy usually costs between $100 and $200 for an entire kitchen.
- What looks like marble but is cheaper? Some cheaper alternatives to marble include epoxy, laminate, or even spray paint. You’d be surprised by how realistic some of these options cost. (Epoxy can usually be a dead ringer, and it has the same beautiful shine!)
- How do you refresh old countertops? Our favorite way to refresh old countertops is with epoxy. It can be made to look like any natural stone, including marble, granite, quartz, jade, and other exotic materials.
We might have missed a question or two in here. If we did, feel free to give us a call! We’re always happy to chat home improvement options and techniques with people!
How to Create Carrara Marble with Epoxy
Looking for a quick step-by-step guide for creating marble with epoxy? Here’s the quick and dirty version! If you want more detailed steps for your project, scroll down to our resources section, or check out this guide here.
1. Prepare your surface
With epoxy, you need a surface on which to pour. Usually, people pour over their old countertops, whether they be MDF, laminate, or something else.
To make Carrara marble, use two layers of white epoxy undercoat. Sand with 220 grit when dry and tape off your edges.
2. Mix your epoxy
For countertops, we recommend a 1:1 ratio of resin to hardener. We usually use 3oz of epoxy per square foot that you want to cover.
Use a paddle mixer and a drill to mix the epoxy. If you don’t have one, a paint stick will do.
3. Mix in color additives
To create Carrara marble, all you need are white and black metallic powders.
Set a little bit of your mixed epoxy aside in a small cup. In the larger container, mix in your white metallic powder. Then, in the smaller cup, mix in the black metallic powder.
4. Pour and spread the white epoxy
Pour the white metallic epoxy over your surface. It doesn’t matter if it’s some kind of wood (like MDF) or something else. Pour the epoy over the surface, and use a 1/8” notch trowel to spread it evenly.
5. Remove trowel lines
The notched trowel spreads well, but it leaves lines. We “chop” them out by dabbing or “chopping” the epoxy with our chop brush. The brush also helps with applying epoxy to the edges of the countertop!
6. Heat the epoxy
Mixing, pouring, spreading, and chopping can create little air bubbles. Use a propane torch or heat gun to soften up the epoxy and allow the air bubbles to rise and leave.
This will also smooth out the texture of the epoxy. Two birds, one stone!
7. Marbleize the epoxy
Using the chop brush again, randomly chop in accents from the black metallic epoxy (in the cup). Don’t spread it uniformly—nature is random!
You may also create marble lines by dripping the black metallic epoxy across the surface. This creates that Calacatta marble look. Or chop it out to create blurrier veins to better resemble Carrara.
8. Smooth out the epoxy
Once again, use a heat gun to remove bubbles and create smoother swirls in the epoxy. You’d be surprised at what a difference this makes!
A heat gun can make your surface go from a striking abstract art piece to something identical to natural stone!
Additional Resources for DIYers
We’ve created a ton of step-by-step instructional guides for working with epoxy. The instructions above are a good start, but you might want instructions with pictures (or a downloadable PDF).
If that’s the case, check out our visual guide for creating Carrara marble with epoxy here.
Or see how we made an even more exotic white marble with additional dyes, metallics, and glitters here.
But if you’re like us, then you probably want to see how it’s done firsthand! Don’t worry—we got it covered.
Here’s the first instructional video we made for Carrara marble:
If you liked that but you want something a little different, check out some of our other videos.
In this one, we created white exotic marble with epoxy:
Look through our YouTube channel for more inspiration! We have so many videos, and we’re sure that at least one of them will help you find out how you want to approach your next home improvement project.
If you were thinking of using Carrara marble, you might now be reconsidering! Especially if you feel the DIY spirit—or if you like saving thousands—then epoxy is hard to beat. Check out what else you can do with epoxy here, and always remember…
You Got This!
Technical Specs
Video Resources
-
Product Highlight
-
Product Tutorial


 Application Information


