

you got this!
Explore, Learn, Be Inspired.
Stone Coat 101

How to Apply Epoxy Over Tile
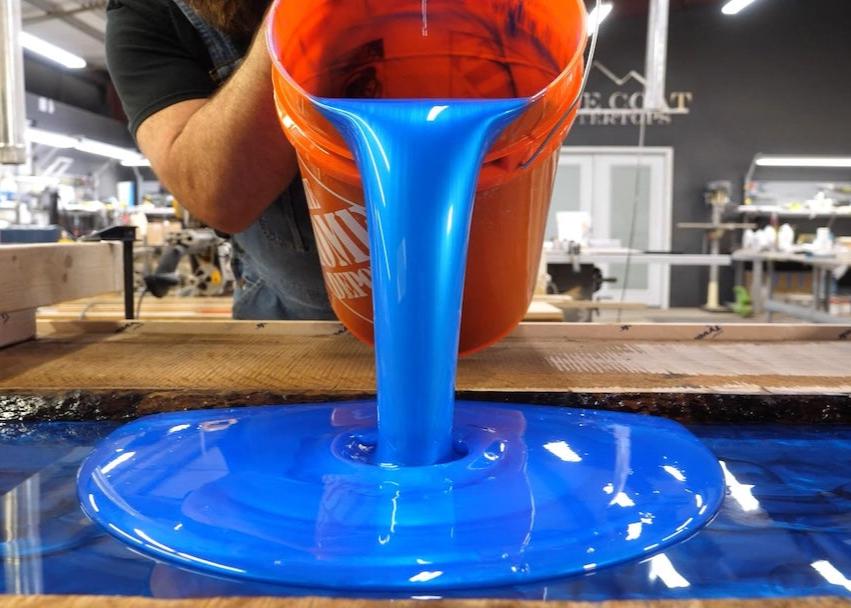
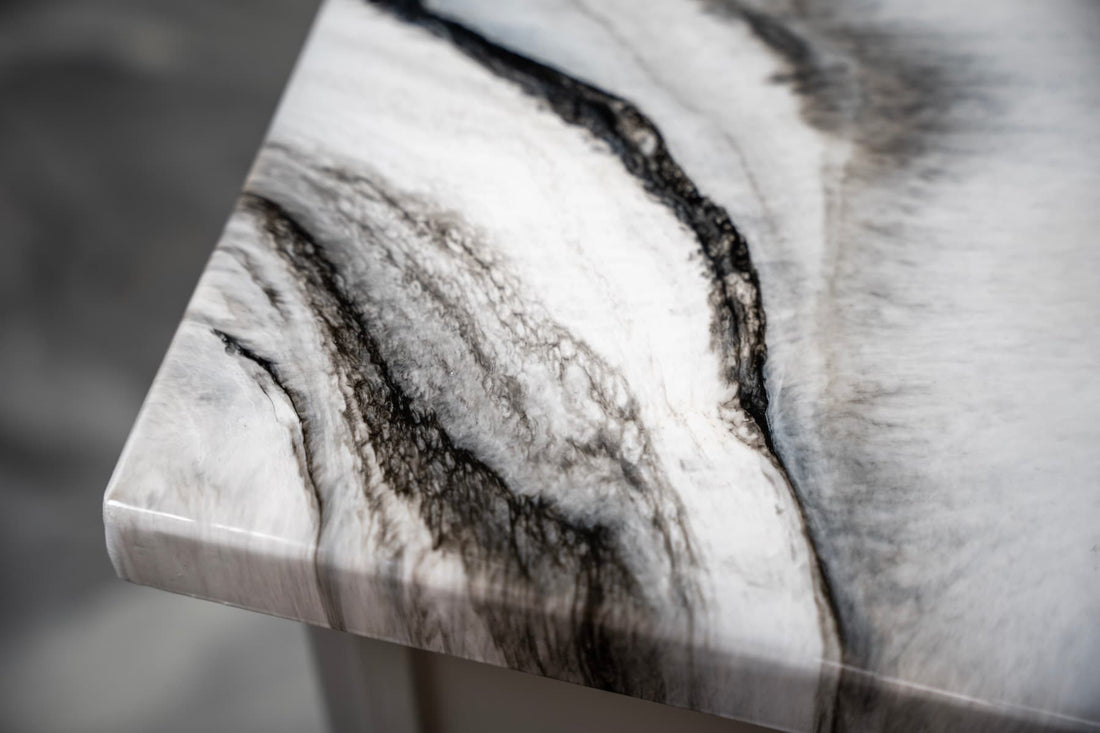
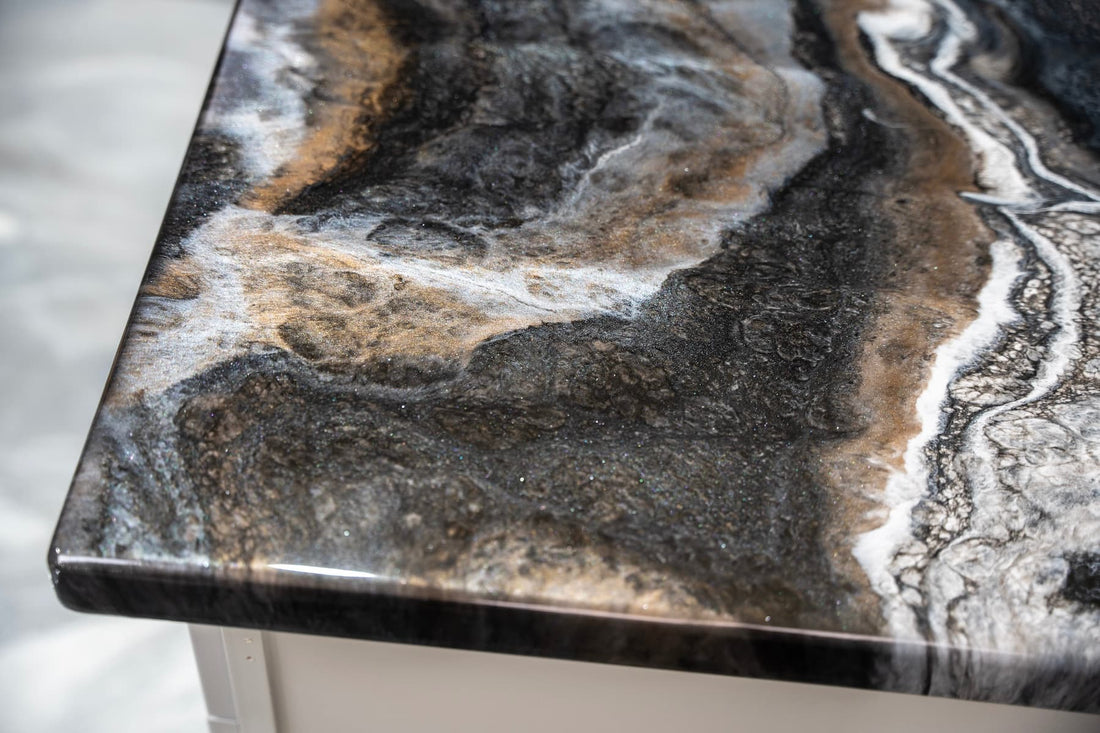
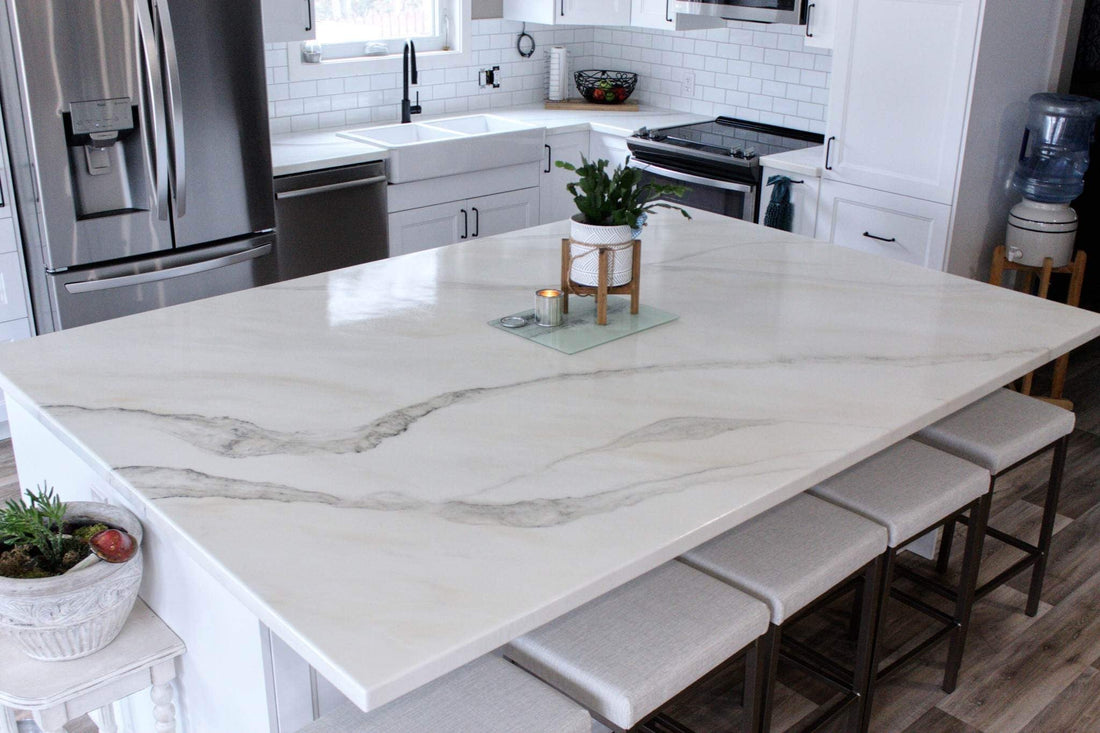
Learn How to Update Tile with Epoxy Updating old tile countertops might feel like a daunting challenge, but using epoxy over tile offers an easy and cost-effective way to achieve a fresh, modern look without the hassle of demolition. Stone Coat Countertops offers an innovative approach that allows homeowners, DIYers, or contractors to rejuvenate kitchens, bathrooms, and other tiled areas with a durable, high-gloss finish that mimics the look of natural stone or marble. This guide provides detailed steps, tips, and video to ensure a smooth application process, helping anyone turn outdated tile into stunning, long-lasting countertops. How to Pour Epoxy Over Tiles PHASE 1: PREPARATION STEP 1: Protect and Prepare the Work Area Before starting your project, it's essential to prepare the work area and tile surface properly. First, remove any fixtures, such as the sink. Check that the shut-off valves are functioning by testing the hot and cold water. Once confirmed, detach the sink from the countertop by removing the hardware and silicone that hold it in place. Keep all the hardware safe for reinstallation after the countertops are complete. Before working with epoxy, ensure that you work in a well-ventilated area. If you don't have sufficient ventilation, a respirator mask must be worn. Also, make sure to wear gloves and protective eyewear. Prioritize safety at all times! STEP 2: Protect Cabinets We recommend using 3 things to cover your space: 3 mil plastic Masking paper Masonite board To protect your lower cabinets from epoxy drips, cover them with 3 mil plastic sheeting. It's also crucial to shield your flooring to prevent any messy spills. To effectively cover your floors, use masking paper combined with tape and Masonite boards to secure it in place. This approach ensures thorough protection and minimizes the cleanup afterward. STEP 3: Thoroughly Clean Tiles Clean the surface of your tiles using an all-purpose degreaser. You’ll want to do this before any sanding to avoid sanding any debris into the tile. Simply spritz a little of the cleaner and wipe it down with a paper towel.If your countertops have excess grease or debris, you’ll want to spend a little extra time cleaning them up. This can be common with countertops near the stove.After the degreaser, spray the surface with a glass cleaner or isopropyl alcohol. STEP 4: Sand Tiles Sanding helps create a strong mechanical bond that will allow maximum adhesion for future layers of material. The first step in this sanding process is to use a 60-grit sander and scuff the surface up. Use a little bit of that glass cleaner or alcohol to help clean up all sanding dust. TAPE DAM? (referenced below, but that step is not called out) STEP 5: Apply Bonding Primer Apply a layer of bonding primer which will help with epoxy adhesion to glossy surfaces like tile. A little goes a long way. Use a small roller to apply a thin layer and allow it to dry for around 30 minutes. STEP 6: Hide Tile Grout Lines Use a combination of a thin-set resurfacing product and a concrete bonding adhesive (which serves as the ‘water’ in the mixture). Shake the bonding adhesive while the bottle is closed before mixing. Use a drill and paddle to mix to a consistency similar to that of chunky peanut butter. Here's a quick tip: you can sometimes get these resurfacing products in different colors. We find that using different colors helps you see what is and isn’t covered. For this layer, our resurfacing product is white and the product we use in our next step is a dark gray. Remember, you can always add more bonding adhesive, but you can’t remove it. It’s a great idea to start with small amounts and increase accordingly. Spread the mixture onto the prepared surface using a 1/8-inch by 1/8-inch square trowel. Use a little bit of pressure to work it into the surface with the smooth side of the trowel. You can use your gloved hands to apply the material along the edges of your countertop and even everything out with your trowel. You can then go back over the lines with a bigger trowel to smooth them out completely. Finally, while the material is still wet, wipe it down with a sponge to ensure the surface dries extra smoothly. At this point, we had to pull the masking tape off. We then had to re-cover with some fresh tape and then let the resurfacing product and bonding adhesive combo dry overnight. STEP 7: Apply 2nd Resurface Layer Sand the previous layer with a 60-grit sander to remove any roughness and sweep off the particles from the sanding process. Mix a thin concrete resurfacer with the bonding adhesive until you reach a consistency that is thinner than something like honey. Spread the mixture with your 1/8-inch by 1/8-inch square notch trowel, pushing it over the edges. It’ll feel easier to move around than the previous resurfacing product because it’s much thinner. Again, you can apply the mixture to the edges of your countertop with your gloved hands and smooth everything over with a larger trowel. If you’re finding that the material isn’t flowing well, you can always add a bit more bonding adhesive to the mix. Allow to dry overnight, and then sand everything down with a 150-grit sander to remove any lingering rough texture. Clean any remaining dust with window cleaner or alcohol. PHASE 2: APPLICATION STEP 1: Apply Epoxy Undercoat Using a small roller, apply a thin layer of Epoxy Undercoat. Use white or black, depending on what your finished countertop look will be. HOW LONG TO DRY? STEP 2: Mix & Pour Epoxy Mix Stone Coat Countertops Epoxy Art Coat with a mixing drill attachment. You will need 3 ounces of mixed epoxy per square foot of your project for your base layer. This base layer will completely hide any joints or low spots. Use our Epoxy Calculator so you know how much product you'll need in total. When you add your dyes, glitters or powders, start with a little and adjust accordingly. A little goes a long way. Mix for two minutes and ensure you scrape the sides and bottom of your container while mixing slowly to pull in any epoxy sticking to them. Then mix at a slightly faster speed to thoroughly incorporate everything. When you’re working on larger projects, it’s okay to combine your epoxy in batches. For this project, we mix two quarts at a time, pour and spread out that section, and then chop any seam lines we see with a brush. Next, pour the mixture in the center of your project’s surface. Evenly spread the epoxy with a 1/8-inch by 1/8-inch square notch trowel. Allow this layer to cure overnight. STEP 3: Pour Colored Epoxy Over Tiles Measure and mix your epoxy according to bottle instructions. This layer will reflect the color of your new countertops, so if you want to add in dyes or powders, you can. We chose to mix 5 different colorants into one mixing container to create a beautiful natural looking exotic stone countertop. Once all colorants are poured into the bucket, pour out epoxy onto the center of your surface. The epoxy will self level and if necessary, lightly pull or push material to the edge of the tape dam. The epoxy will take some time to self level. After the exotic pour is on the surface, add your desired accent color in small veins across the epoxy. Thin lines are ideal following contour lines of color to make it look as natural as possible. Any of these steps involving color are totally customizable to the look you want to achieve. For example, we repeated this step for the other sections of the countertops with the same colors. Once the surface is covered, mist the surface with 91% isopropyl alcohol which will cause the epoxy to marbleize. STEP 4: Remove Tape and Coat Edges After about an hour, peel any tape to let the epoxy flow over the edges creating a consistent coating over the natural looking stone edge. Using your gloved hand, remove tape dam and let epoxy flow over the edge. You can use your hand to rub the edges down for total epoxy coverage. Finally, allow this layer to cure overnight. STEP 5: Apply Top Coat Stone Coat's Ultimate Top Coat is the perfect final touch to our amazing countertop system. Our Top Coat is available in Natural Matte or Glossy finish. First, mix and shake Part A. Then mix the Top Coat at a 2:1 mix ratio. Multiply the total ounces of A and B mixed by .19 to calculate how much water to add. Mix thoroughly for 1 minute and pour into a paint pan. Use a 1/4" microfiber roller to apply uniformly. After that, switch to a dry roller and repeat the process removing any lap lines. Allow the top coat to dry, then enjoy your new countertops! CARE & MAINTENANCE To keep your new DIY countertops looking their best, clean regularly with a soft cloth or sponge and mild soap (avoid harsh chemicals or abrasive cleaners). Keep a set of epoxy polishing compound and cleaner on hand to repair any microscratches that may occur over time with heavy use. Not only will it repair the scratches, it makes your counters dazzle like they were just installed!
Learn more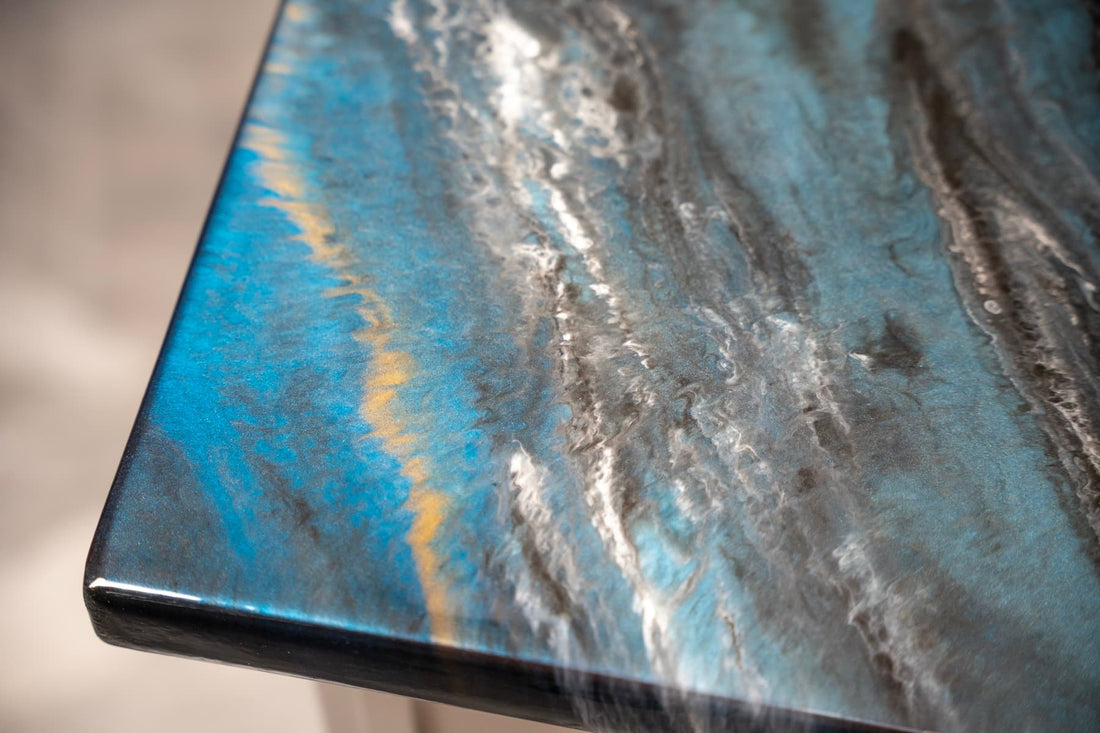
How to Apply Epoxy Over MDF for DIY Countertops
How To Prep MDF For Epoxy Countertops Fabricating your own countertop base material is one of the fastest and easiest ways to get your new Stone Coat Epoxy Countertops poured and installed. We recommend using MDF (Medium Density Fiberboard) over plywood as it’s more stable and more affordable. Wood products contain moisture, which can affect your epoxy pours. However, MDF is prone to absorb moisture which is why we have a few prep steps. MDF is easy to find at any major home improvement store in various sizes. If you’re looking for an alternative to MDF you can also use insulation foam board. Step 1: Build a MDF Substrate Once you’ve measured the size and shape of your countertops, cut your sheets of MDF to size using a table saw or circular saw with a straight edge or guide. You’ll need to add a drop edge for all exposed edges (remember to account for your overhang) so use your MDF drops for 1.5” strips to attach along the underside. You can glue these strips in place with wood glue and clamps or speed the process along by using wood glue and a pin nailer. Make sure your drop edges are as flush as possible with the sheet of MDF. If the countertops are going to be anywhere with an opportunity for moisture to be in the air like a humid bathroom or have splashes like around a sink, we recommend applying Red-Guard waterproofing membrane or a similar product to the bottom of the MDF panel. Step 2: Countertop Edges This comes down to personal preference. Decide if you want natural stone edges, a chamfer, bullnose edges, or a round-over. We recommend using Bondo to coat the edges first to hide any seams or, in the case of making a natural stone edge, a surface to shape to your preference. Once you apply the Bondo and allow it to dry sand the edges smooth with 220 grit and shape with a router or sander according to preference. Step 3: Surface Prep Clean the surface and make sure it’s dry. Apply two coats of Stone Coat Countertops Undercoat Epoxy directly to the MDF surface and edges. If you’re making a dark or colorful countertop, use Black Undercoat. If you’re making a white or light countertop, use White Undercoat. If you’re in between, you can always mix black and white Undercoat to make a grey base. Once the first coat is dry, apply a second coat and allow to dry. Step 4: Pick a Countertop Recipe and Start Pouring! You Got This!
Learn more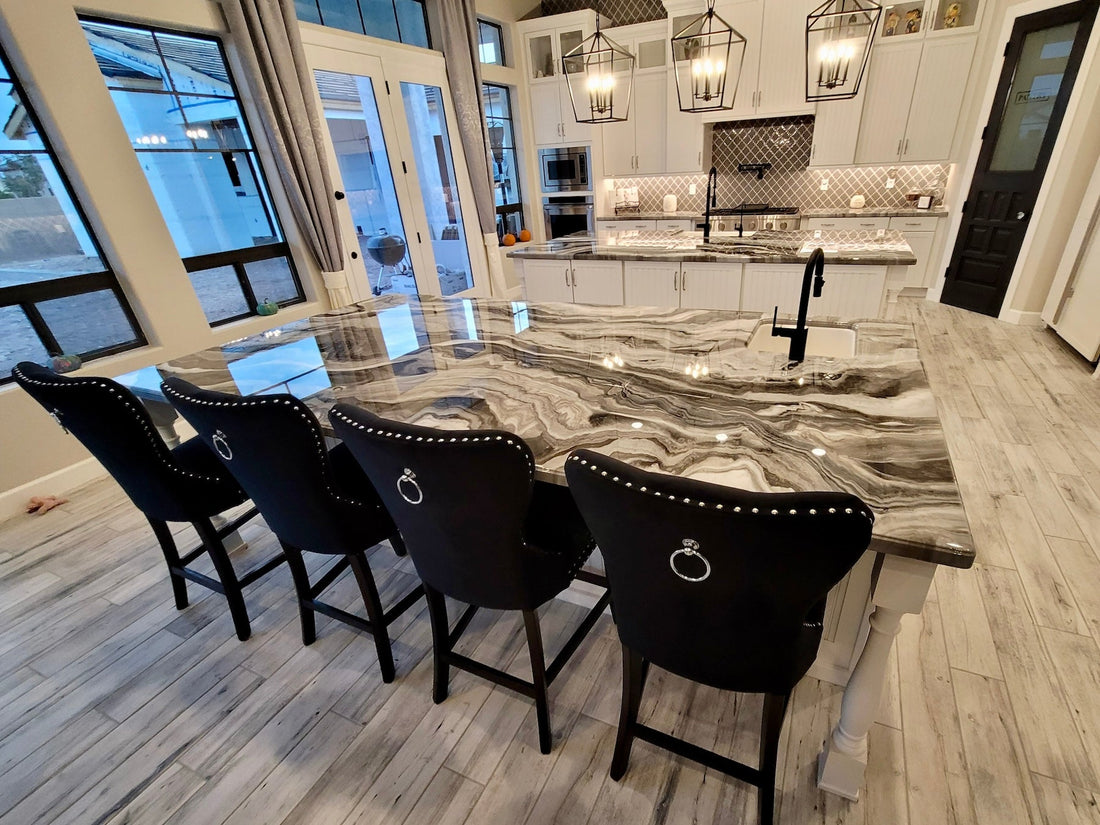
How to Apply Epoxy Over Laminate Countertops
DIY COUNTERTOPS - Learn How to resurface Laminate Countertops Are you ready to transform your dated laminate surfaces into the focal point of your kitchen or bathroom? We're going to teach you a creative and cost-effective way to renovate your [...]
Learn more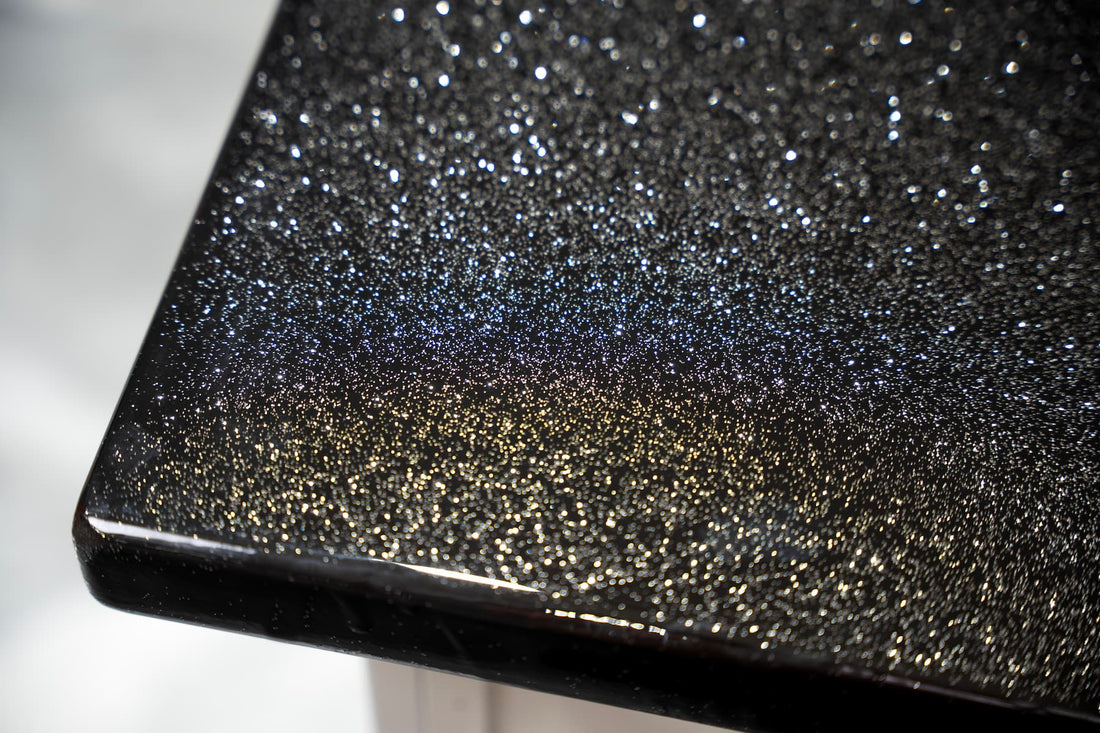
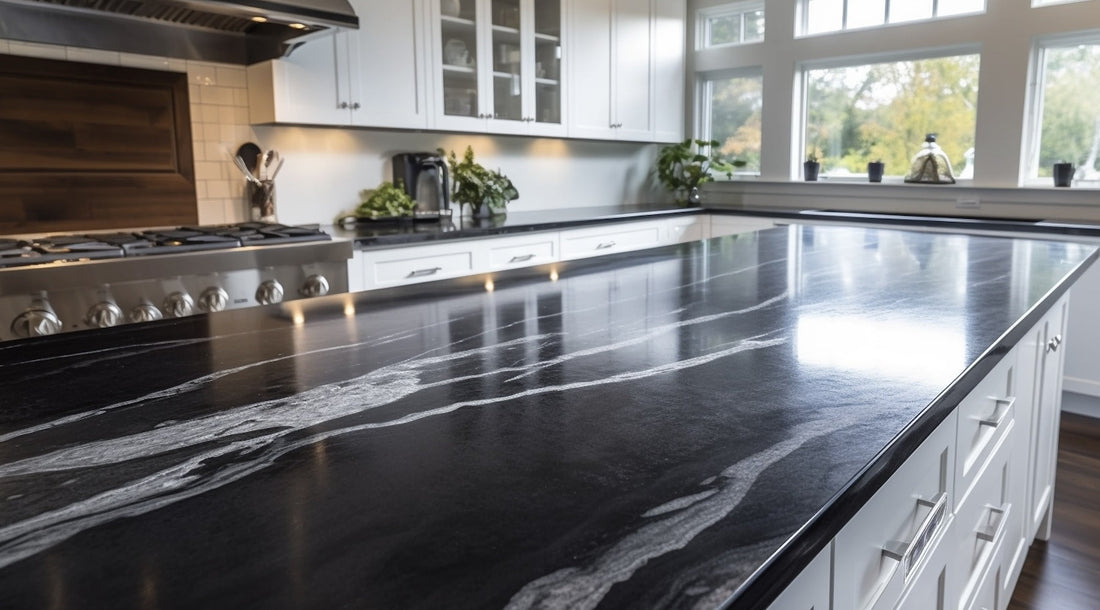
Black Galaxy Granite with Epoxy Tutorial
Black galaxy granite is a gorgeous natural stone that can be beautifully mimicked with Stone Coat Countertop Epoxy. It’s time to add new life to your home! And there’s no statement piece more striking than black galaxy granite. But there’s a lot you should know about granite before you include it [...]
Learn more