

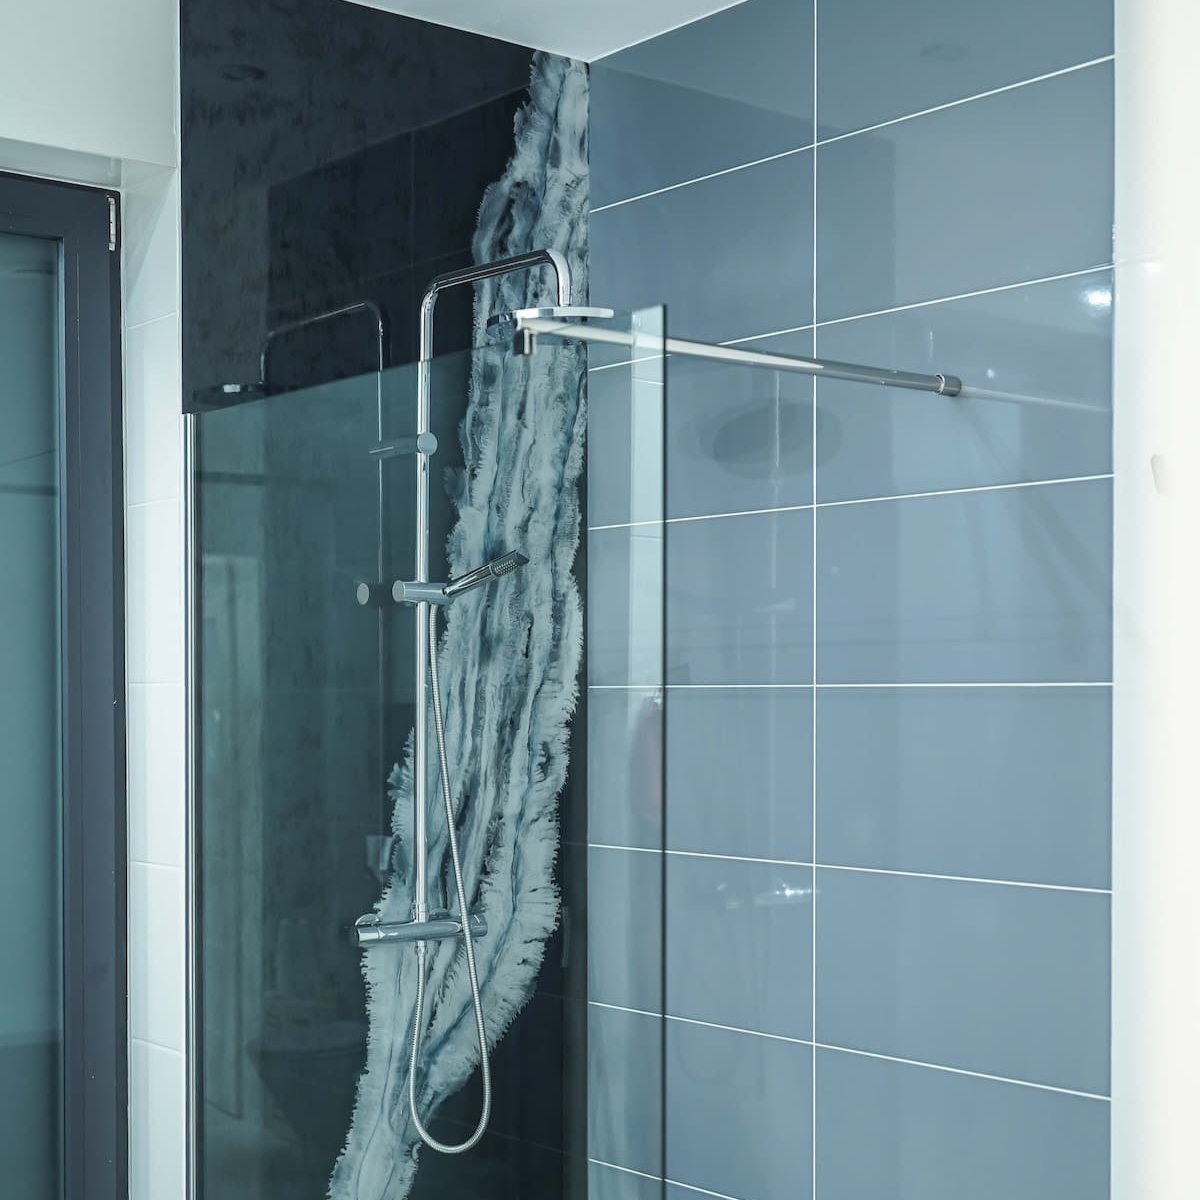
Are you looking for something to bring your old shower to life? Epoxy shower walls are an affordable alternative to a shower renovation.
Epoxy is a fantastic option for bathrooms. It’s durable, easy to work with, and it looks incredible.
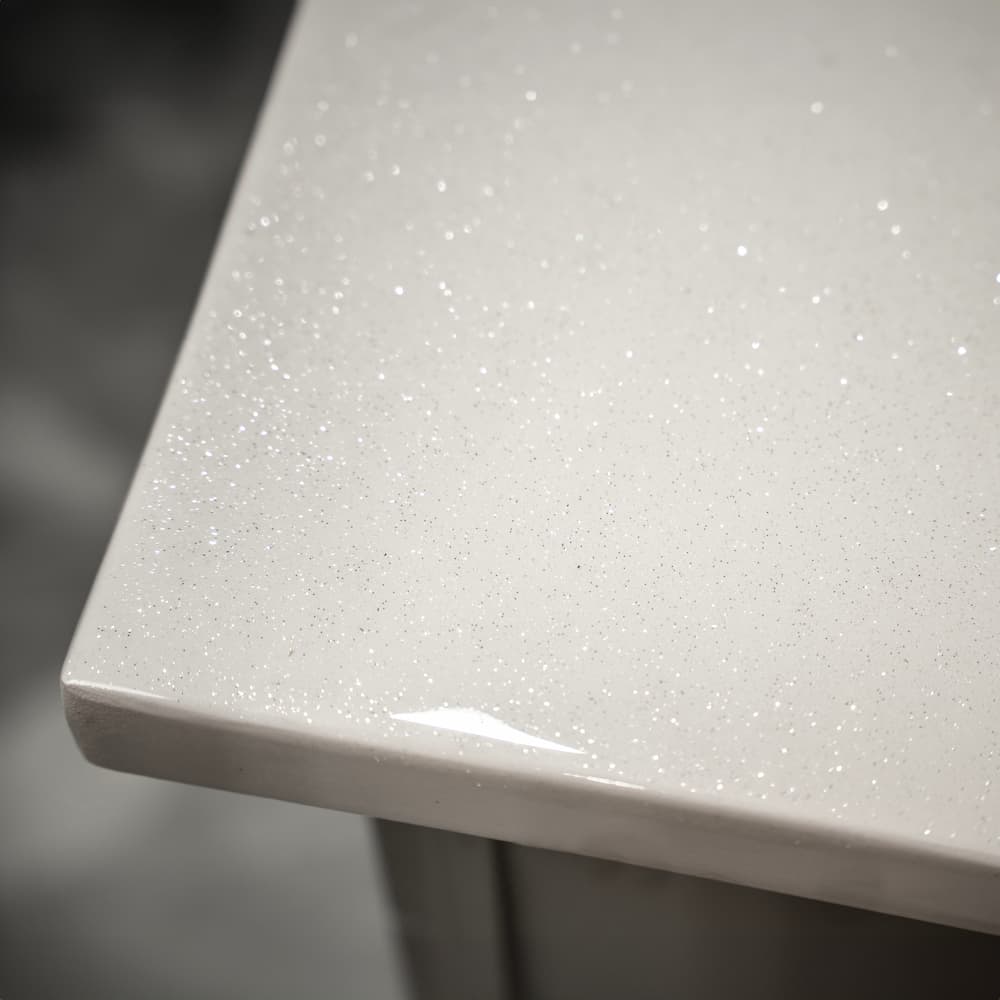
Do you want your shower to look like Carrara marble? How about fractured granite? Or quartz with natural blue highlights?
If yes, then epoxy will do the trick and for a fraction of the cost of actual exotic stone. Epoxy shower walls are lightweight, making them easy for a single person to install them.
Step-by-Step Guide to Creating Epoxy Shower Walls
Follow our written or video tutorials below.
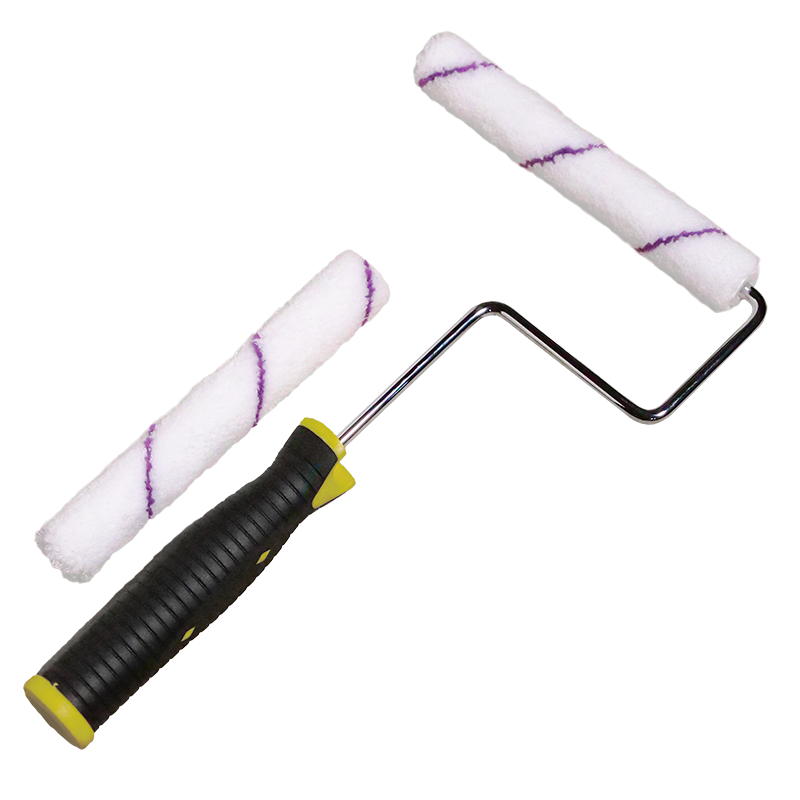
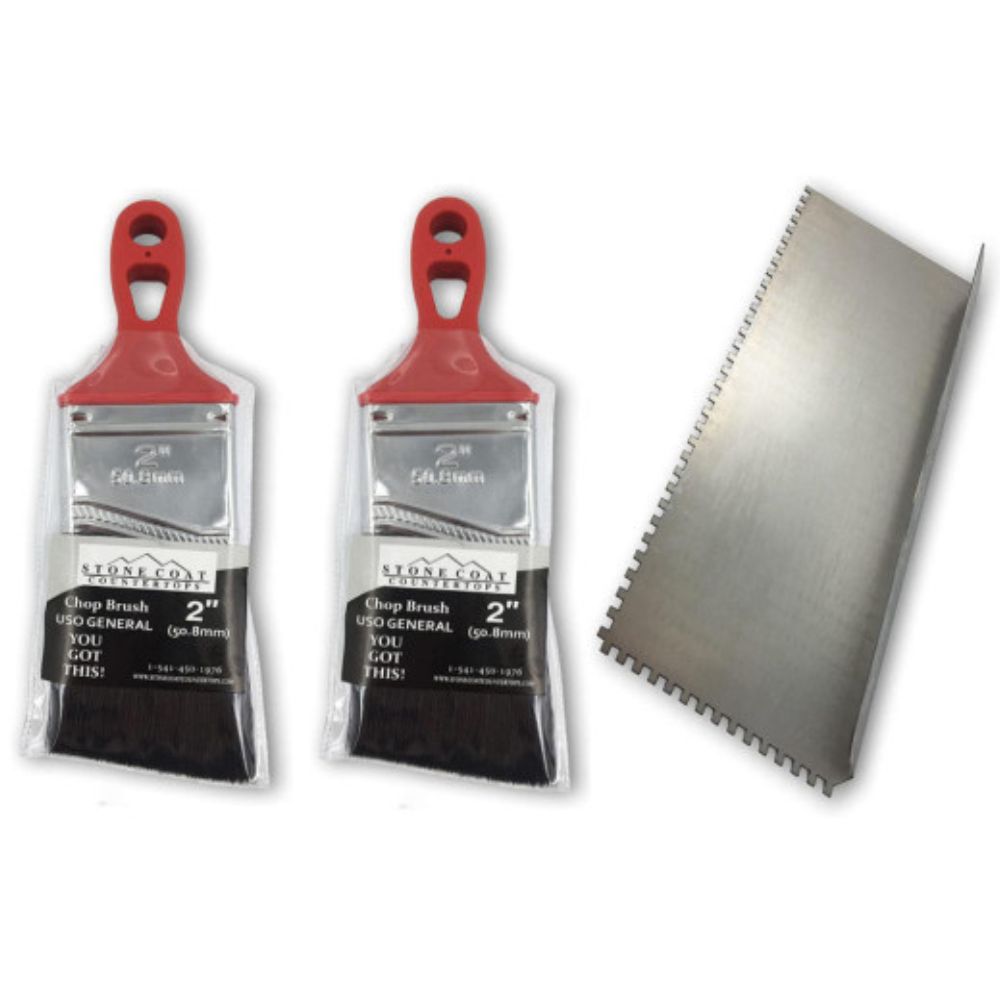
OTHER TOOLS & SUPPLIES
OTHER TOOLS & SUPPLIES
- 4’ x 8’ XPS Foam panels from the Home Depot
- PPE (gloves, eye protection, apron)
- Blue masking tape
- Utility knife
- Mixing bucket/Cups
- Popsicle sticks
- Drill & Mixing paddle
- 91% isopropyl alcohol & spray bottle
- 100% silicone & Caulking gun
- Paintable Latex Caulking
- 120-180 grit sandpaper
- Random Orbital Sander
Step-by-Step Guide to Creating Epoxy Shower Walls
Before you start:
IMPORTANT: When you purchase ½" to 1" pink, water-resistant, high-density, closed-cell foam panels from a home improvement store, it is crucial to allow them to fully dry and acclimate before coating them with epoxy. If there is moisture between panels or on the surface of any panel, separate and let them dry thoroughly in a well-ventilated area, as trapped moisture can lead to bubbles, blistering, and failure later. To speed up drying, set a fan to blow dry air over the panels.
STEP 1: CUT & PREPARE FOAM PANELS
Cut your foam panels to size to fit your shower project before starting the steps to reinforce the foam for a shower wall application.
1. Cut the Foam Panels to Size
Start by cutting your foam panels to the exact dimensions needed for your shower project.
2. Use Foam Panels as a Template
Place the cut foam panels in the shower area to serve as a template. This ensures a precise fit.
3. Create Gaps for Epoxy Penetration
Insert a popsicle stick between each panel seam. This creates a small space for the epoxy to penetrate and secure the seams when you apply the mesh coat.
4. Join Panels with Blue Masking Tape
On the big, back shower wall, seam the foam panels together using blue masking tape. This holds the two panels securely in place.
After the template is complete, remove the large back wall and apply masking tape to the back of the seam. This reinforces the panels for transport.
STEP 2: Reinforce Outside Edge
For installing permanent glass shower doors or a shower curtain rod, we suggest adding a sturdy strip that won't compress under installation pressure. Attach a 2-6-inch-wide strip of material (matching the foam panel's thickness) along the outer edge of each smaller shower panel. You can find suitable materials in the trim section of your hardware store in different thicknesses. Once in place, this strip will be coated with epoxy and positioned beyond the curtain or door area, keeping it protected from shower water. Use a popsicle stick as a spacer (like on the large shower wall seam) and tape the foam's back to maintain spacing, allowing the epoxy to penetrate for a durable, lasting shower wall. Round-over the top and bottom edge to help the epoxy flow evenly over the edge.
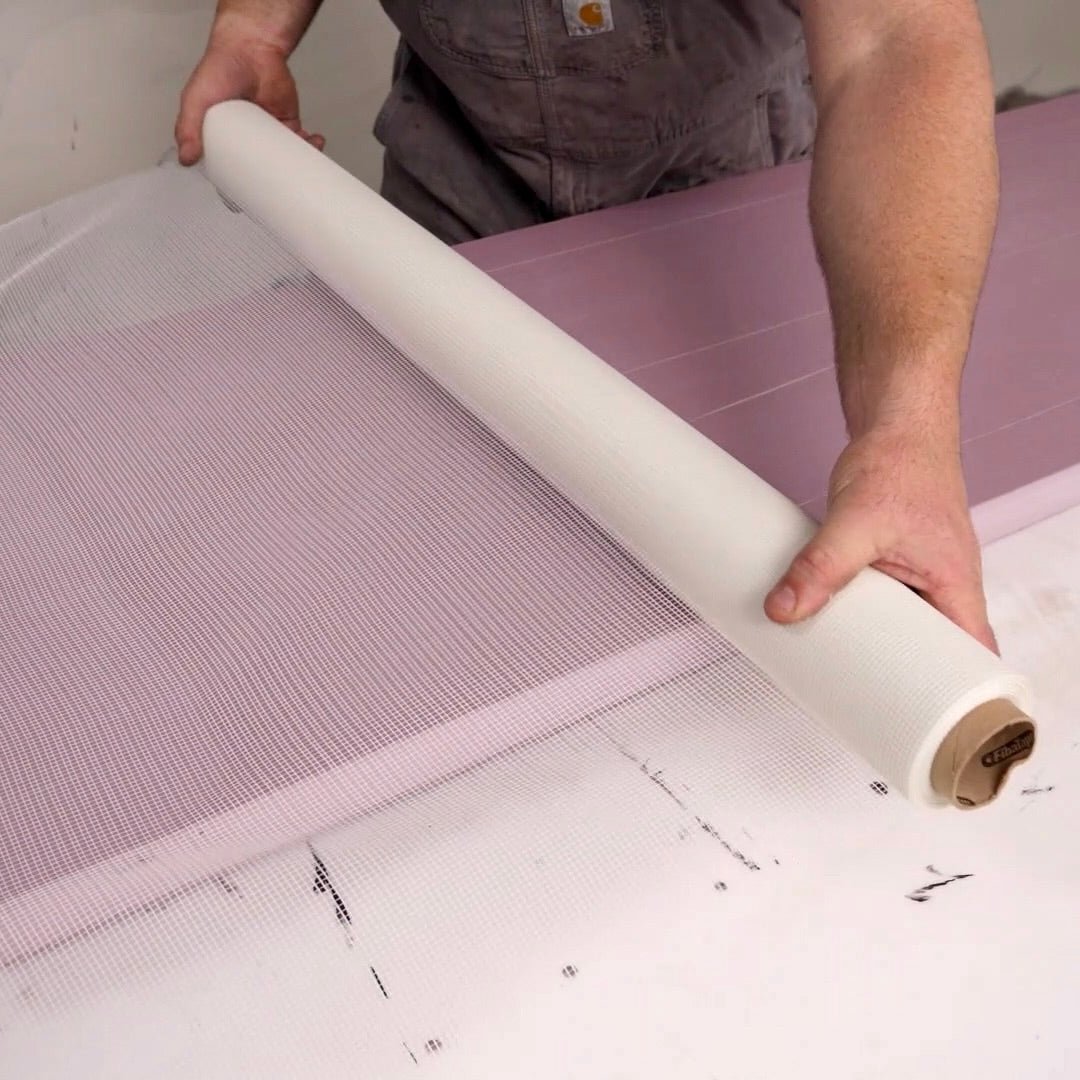
STEP 3: Apply Fiberglass Mesh Reinforcement
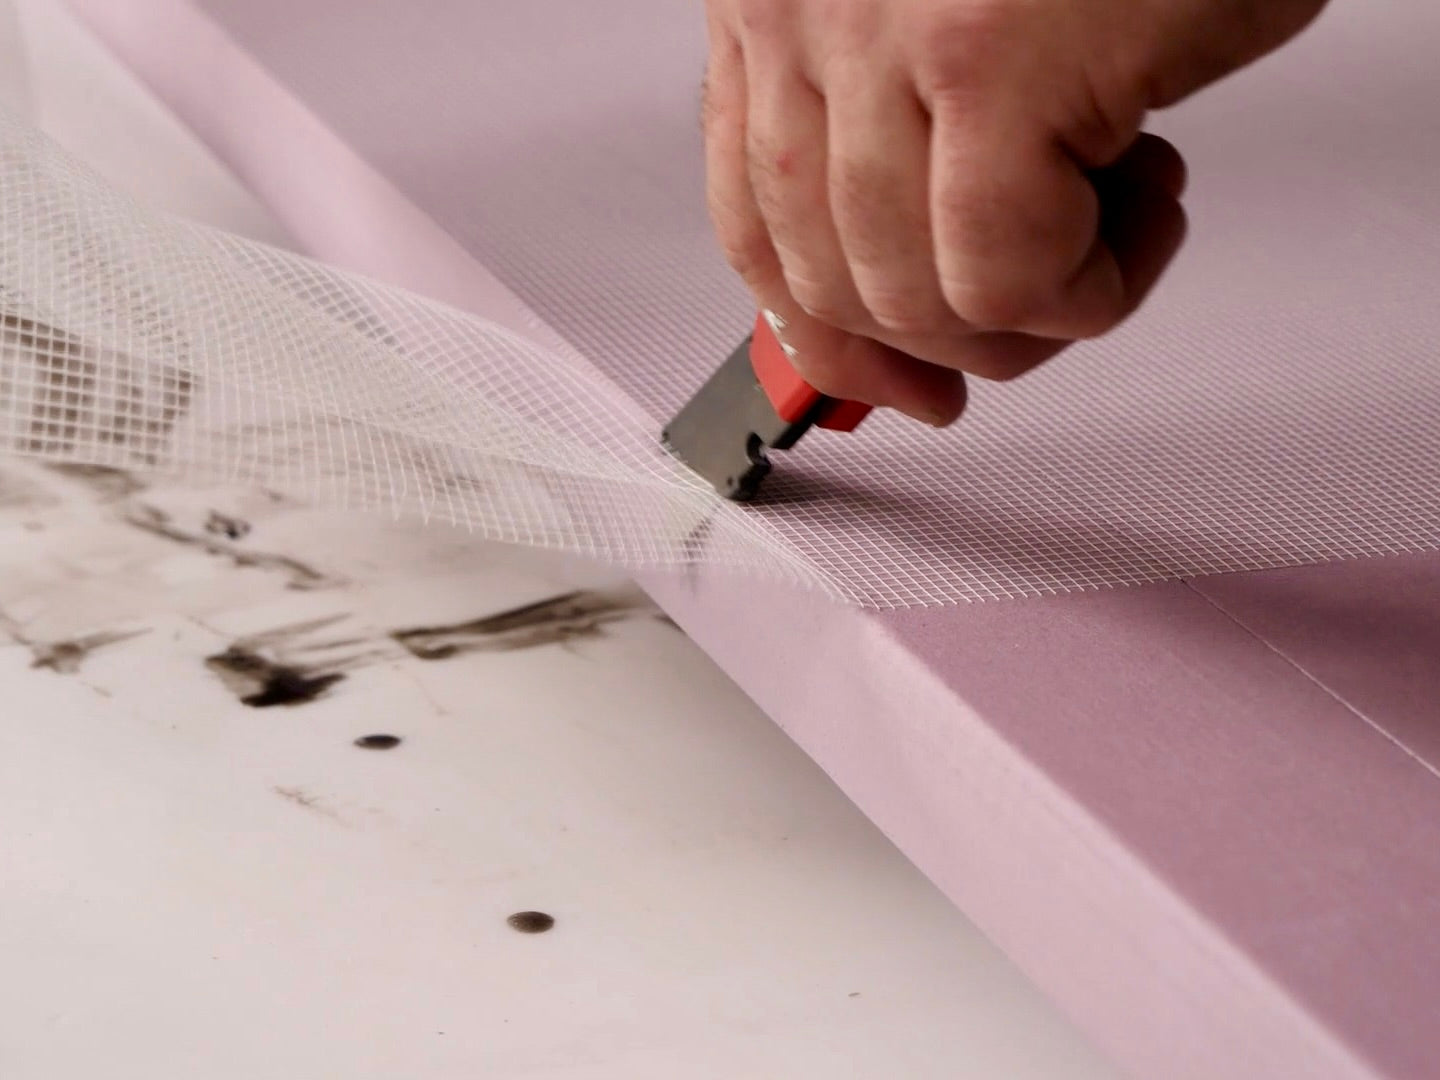
Ensure the foam panel is clean and dry. If there is a slightly high spot where the foam meets the reinforced edge, sand it with 120-220 grit sandpaper and remove dust with compressed air or a microfiber cloth. Remove the blue masking tape from the surface of the foam panel, keeping the tape secured to the back of the panel to keep the epoxy from flowing out of the seam.
Apply Stone Coat's fiberglass mesh smoothly over the back panel and two side panels of the foam shower walls. Take time to press the mesh down evenly, minimizing wrinkles. It’s fine if the mesh overhangs; after applying, use a utility knife to trim it close to the edge. A Bondo spreader or magic trowel can help press the mesh down smoothly with little effort.
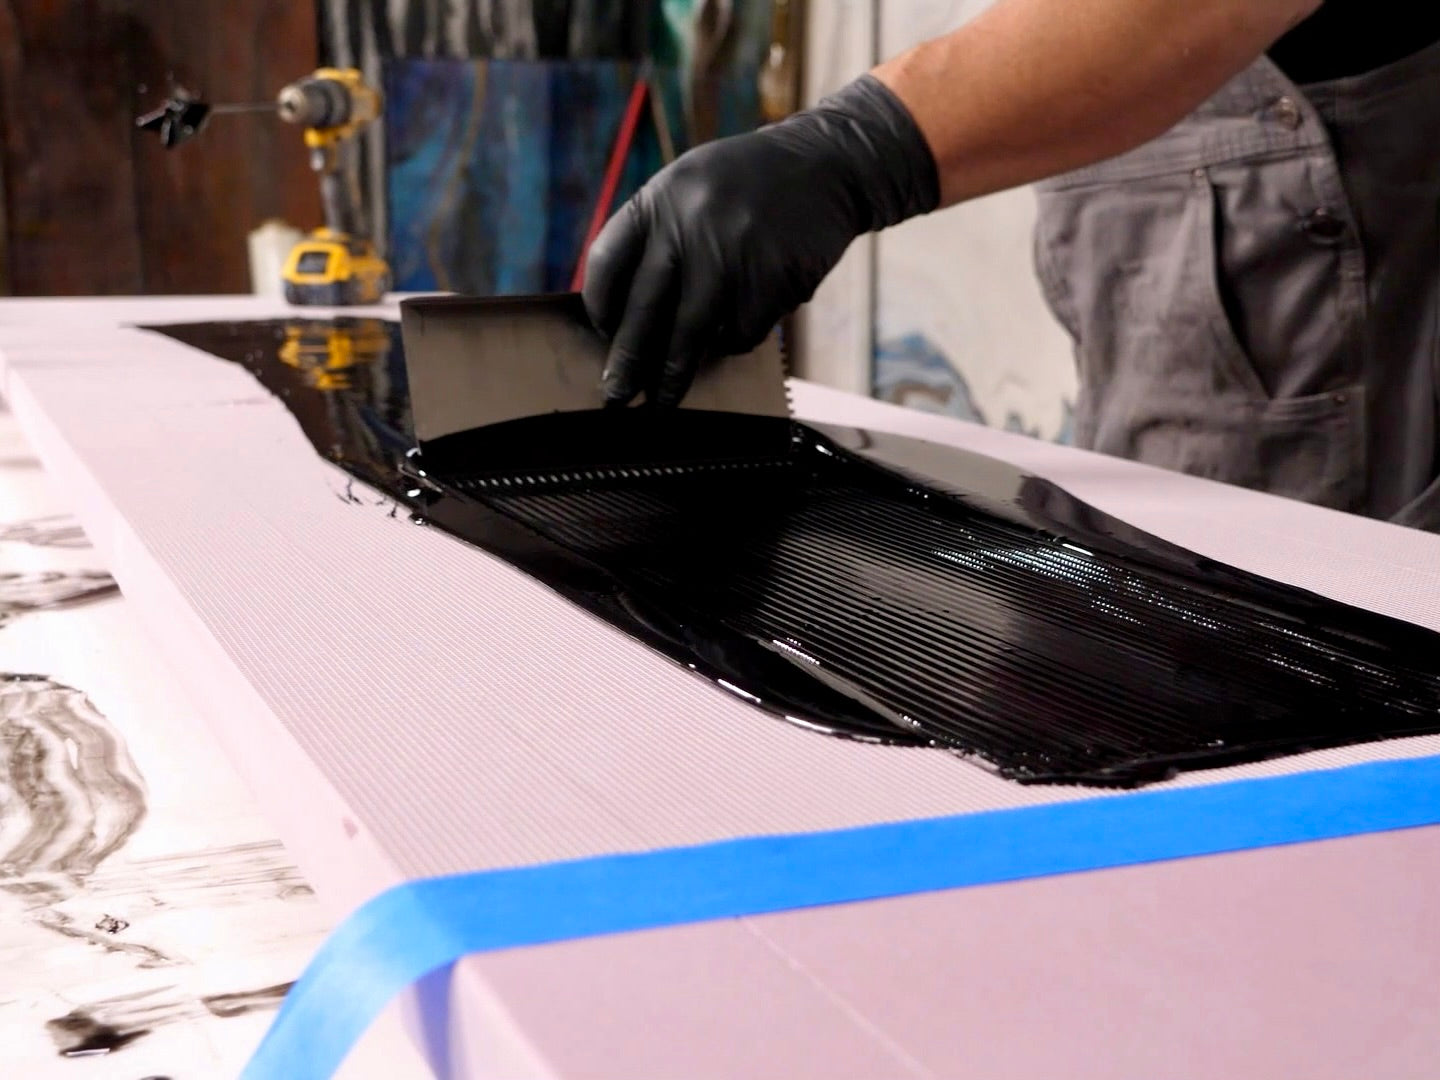
STEP 4: Reinforce Fiberglass Mesh with SPEEDCURE Epoxy
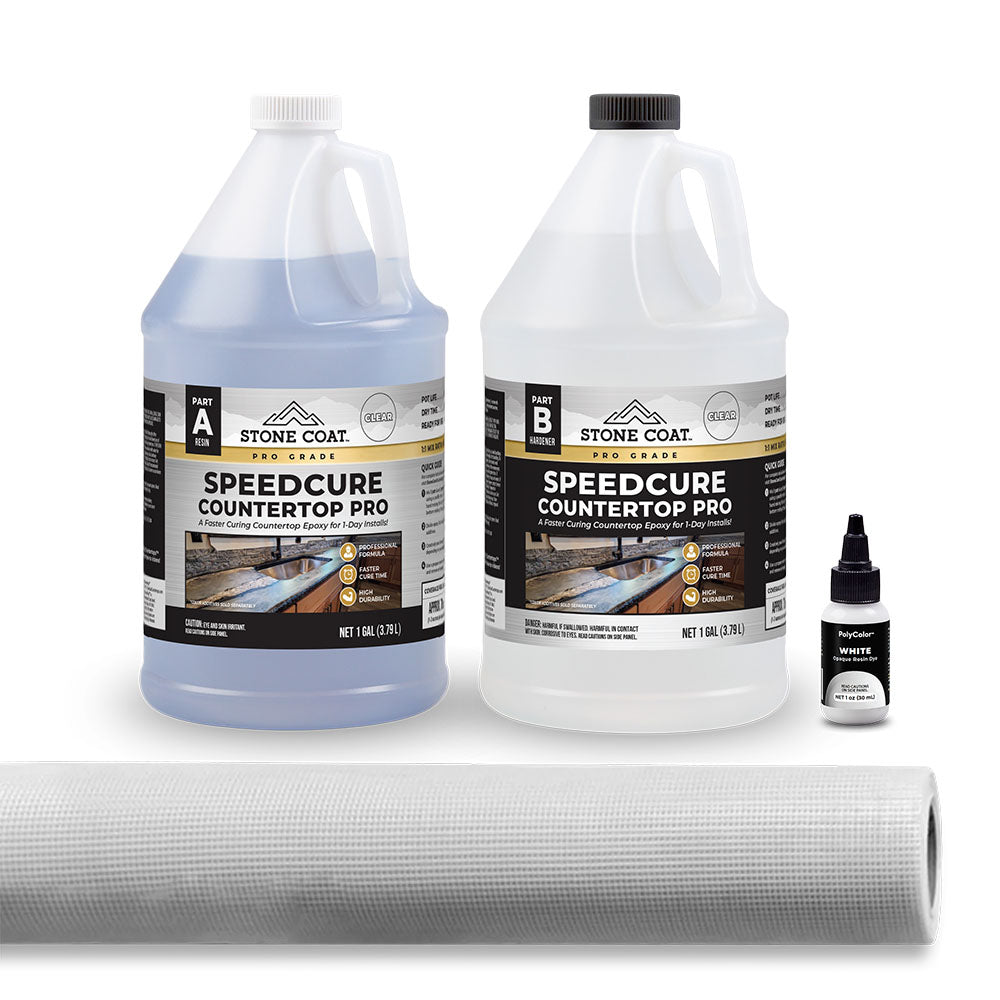
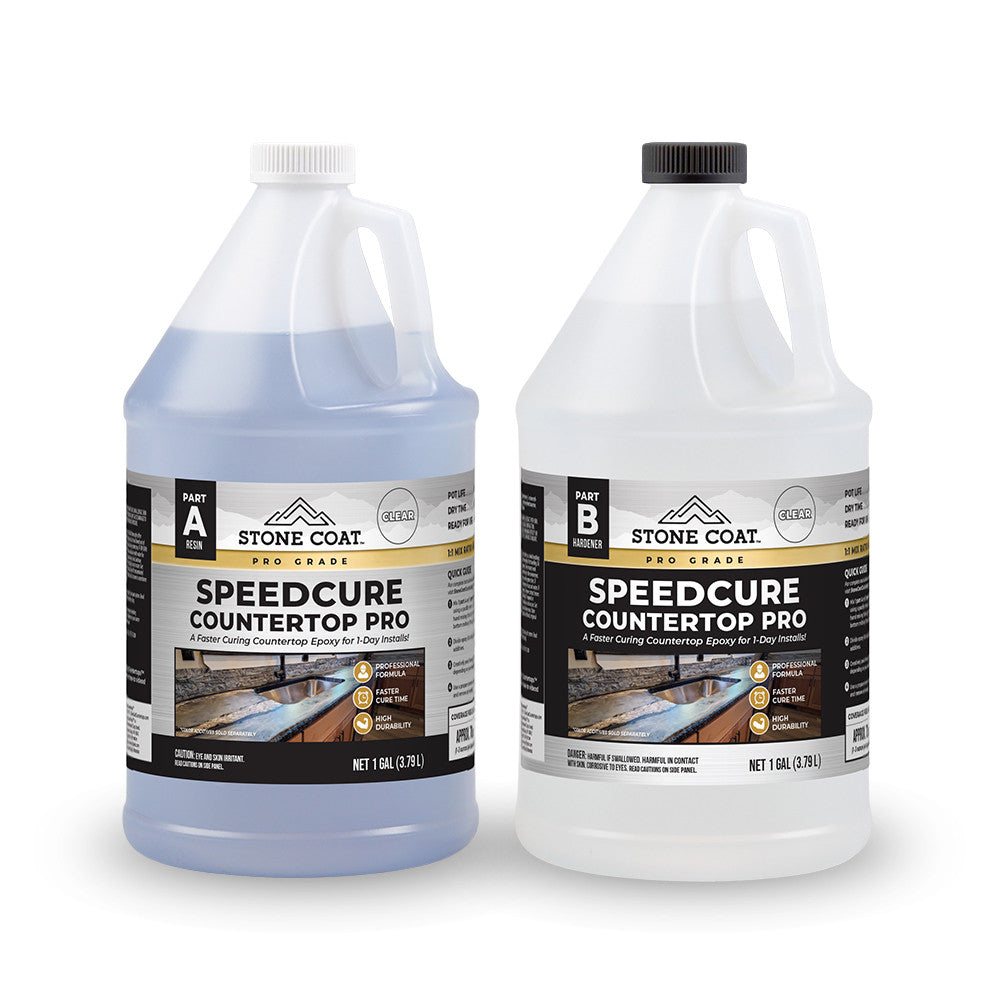
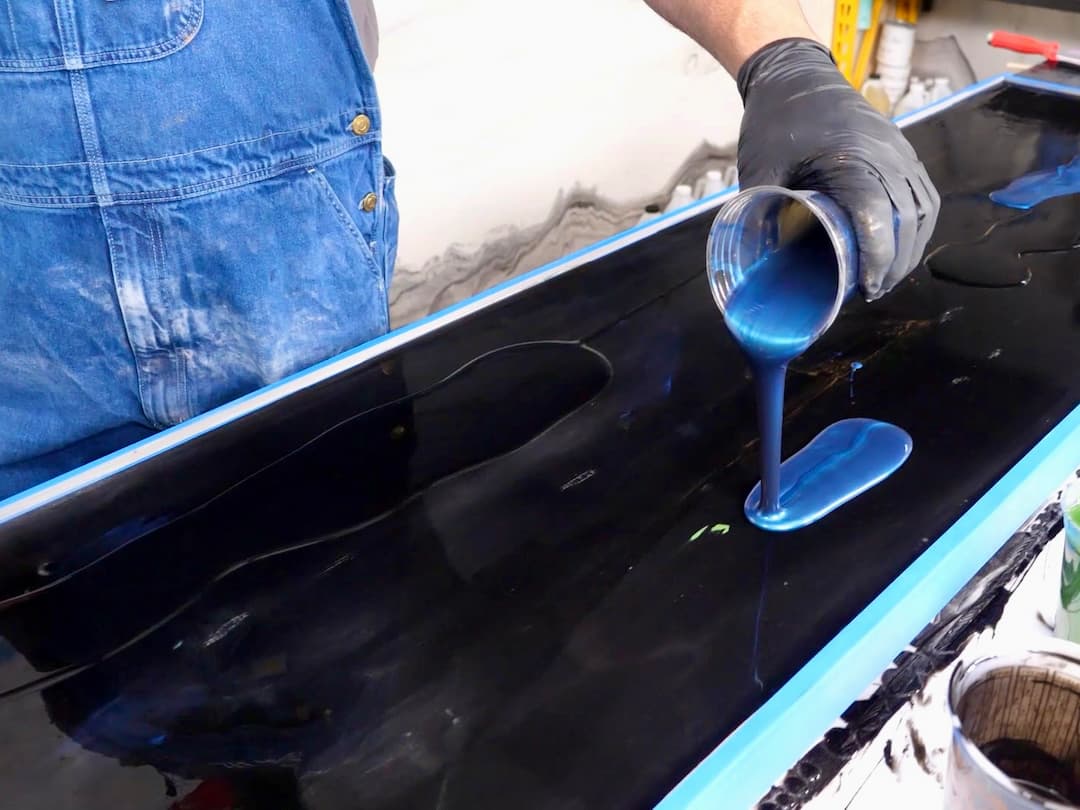
Measure and mix 4 ounces of epoxy per square foot of the shower panel, using a 1:1 ratio by volume. Mix the SPEEDCURE Epoxy for one panel at a time. Start by pouring in Part B, then add Part A. Blend with a paddle mixer attached to a drill for 90 seconds, scraping the bucket's sides and bottom to ensure thorough mixing. Add Black or White Polycolor Liquid Dye to tint the epoxy, then mix again for 30-60 seconds.
Pro Tip: SPEEDCURE cures faster and is thicker than standard countertop epoxy, so remove it from the mixing bucket immediately to maximize working time.
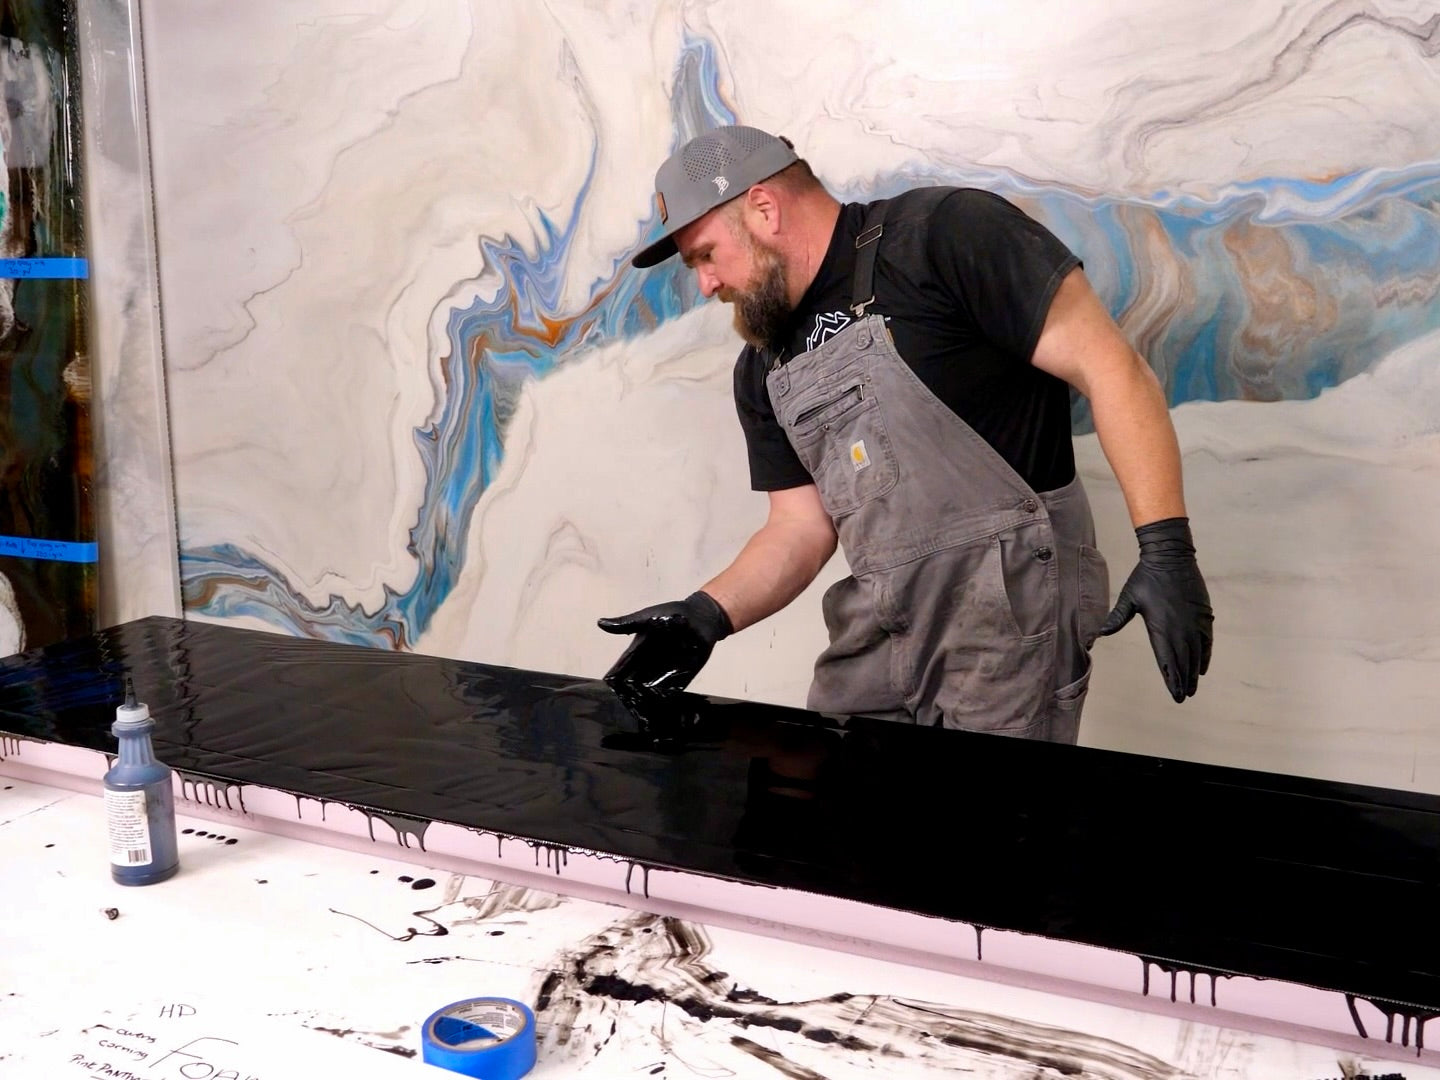
After mixing, pour the epoxy in a wide ribbon across the panel. Spread it evenly with gloved hands or a Stone Coat ⅛’’ x ⅛’’ notch trowel, using light pressure to avoid lifting the mesh. If some mesh lifts, don’t worry; any high points or sharp edges will be sanded before applying the final marble coat when the SPEEDCURE is ready for the next step in 4 short hours. There is no need to remove microbubbles with heat sources like a propane torch or heat gun, as this epoxy layer will be fully covered by your marble coat. Using heat on SPEEDCURE over mesh may cause the mesh to lift from the foam, leading to extra epoxy work or sanding. Instead, you can mist the epoxy a few times with 91% isopropyl alcohol to eliminate any bubbles introduced during mixing.
Pro Tip: Ensure the foam panel is fully supported to prevent bowing when applying epoxy. Use wide foam strips or a full sheet cut 2 inches smaller than the panel to provide support during the epoxy pour.
STEP 5: Sand High Points & Sharp Edges
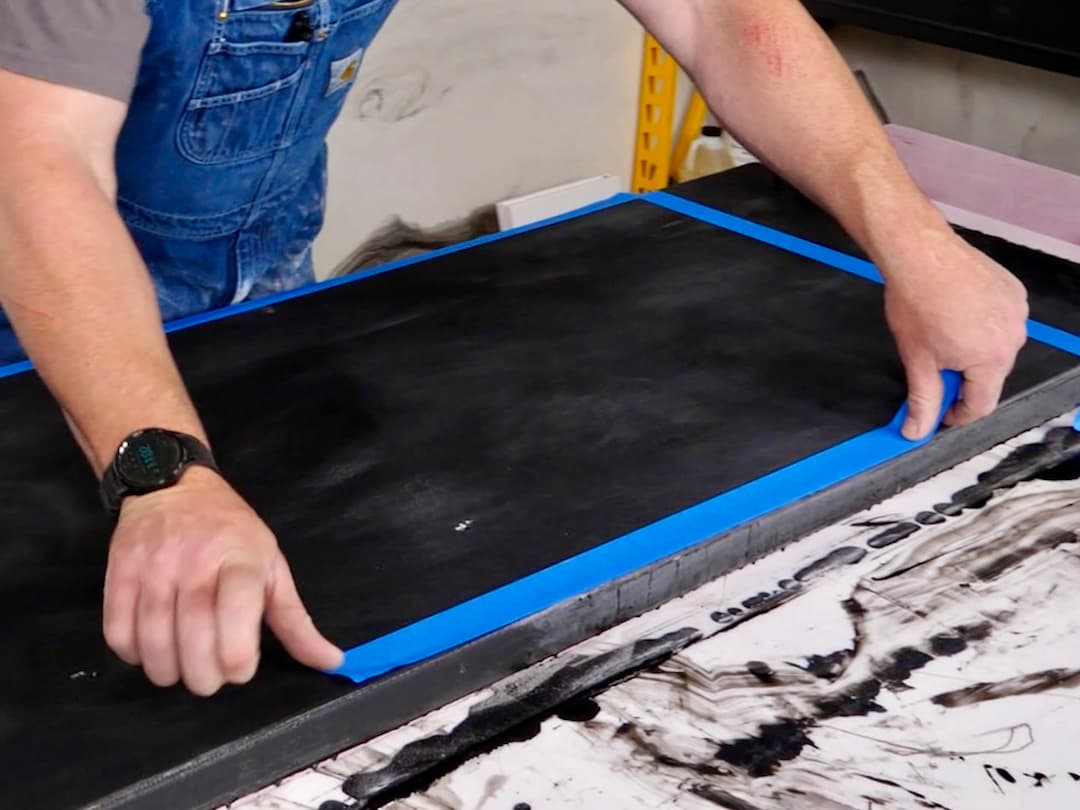
Once the SPEEDCURE is fully dry (4-5 hours after mixing), use 120-180 grit sandpaper with a random orbital sander to smooth any high points and lifted mesh to match the rest of the panel. Hold the sander at about a 45-degree angle to sand down sharp mesh edges and smooth any high points. If larger areas of mesh have lifted, sand them thoroughly to avoid "ghosting" through the marble coat. You can also apply an additional 2-4 ounces of SPEEDCURE to prevent extensive sanding on larger lifted mesh areas.
Pro Tip: For the dirty pour technique or other epoxy finishes that require extra material and a tape dam, use blue tape with foam window insulation as the dam. Blue masking tape alone doesn’t adhere well to foam panel edges.
Blue Tape/Foam Window Insulation Tape Dam:
Use ½" wide by ⅜" tall foam window seal with adhesive on one side.
- Apply blue tape around the outer surface of all four sides of the shower panel.
- If the window insulation is ½" wide, add a ⅜" wide blue tape strip along the outer surface of the panel edge.
- Peel the paper backing and attach the sticky side of the foam window insulation onto the blue tape, ensuring the sticky side doesn’t contact the epoxy as it can be hard to remove. Use the roll of blue tape to press down the foam insulation, keeping the dam secure.
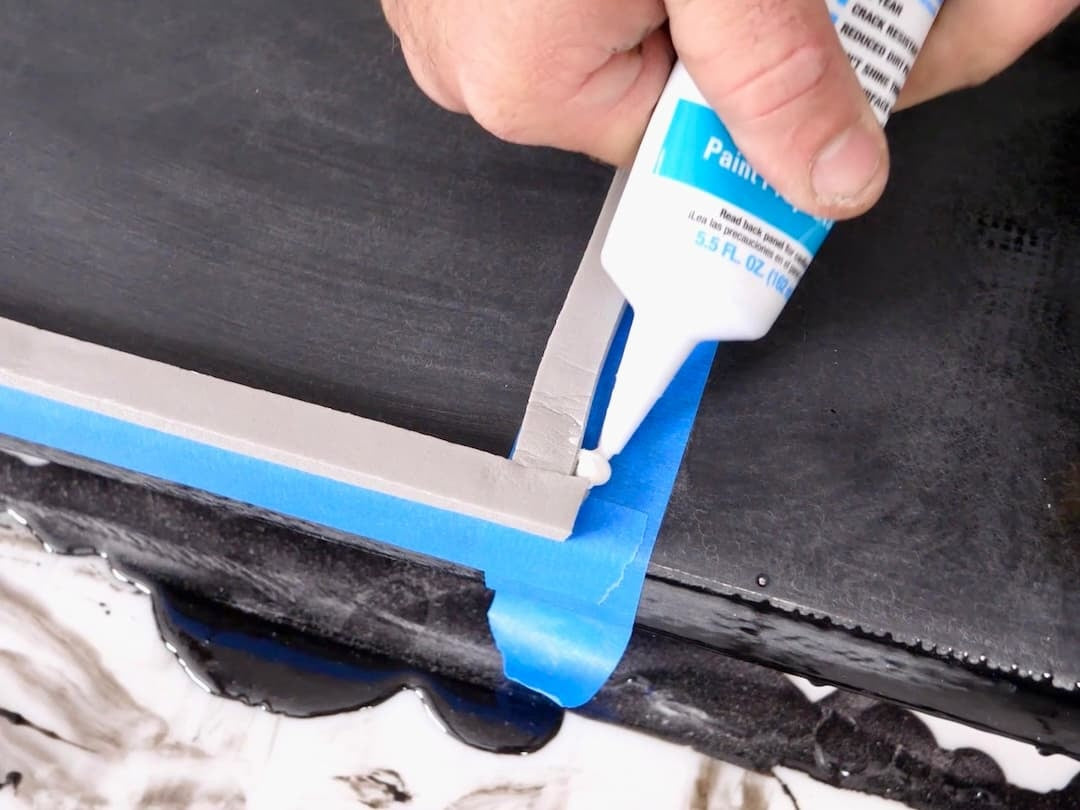
- Seal the four outside corners of the window insulation with latex caulking to prevent leaks.
- When the epoxy thickens (1.25-2.25 hours after mixing), peel off the dam by lifting the blue tape below the foam. Use gloved fingers to spread epoxy evenly over the edges by pulling the leading edge across any dry spots.
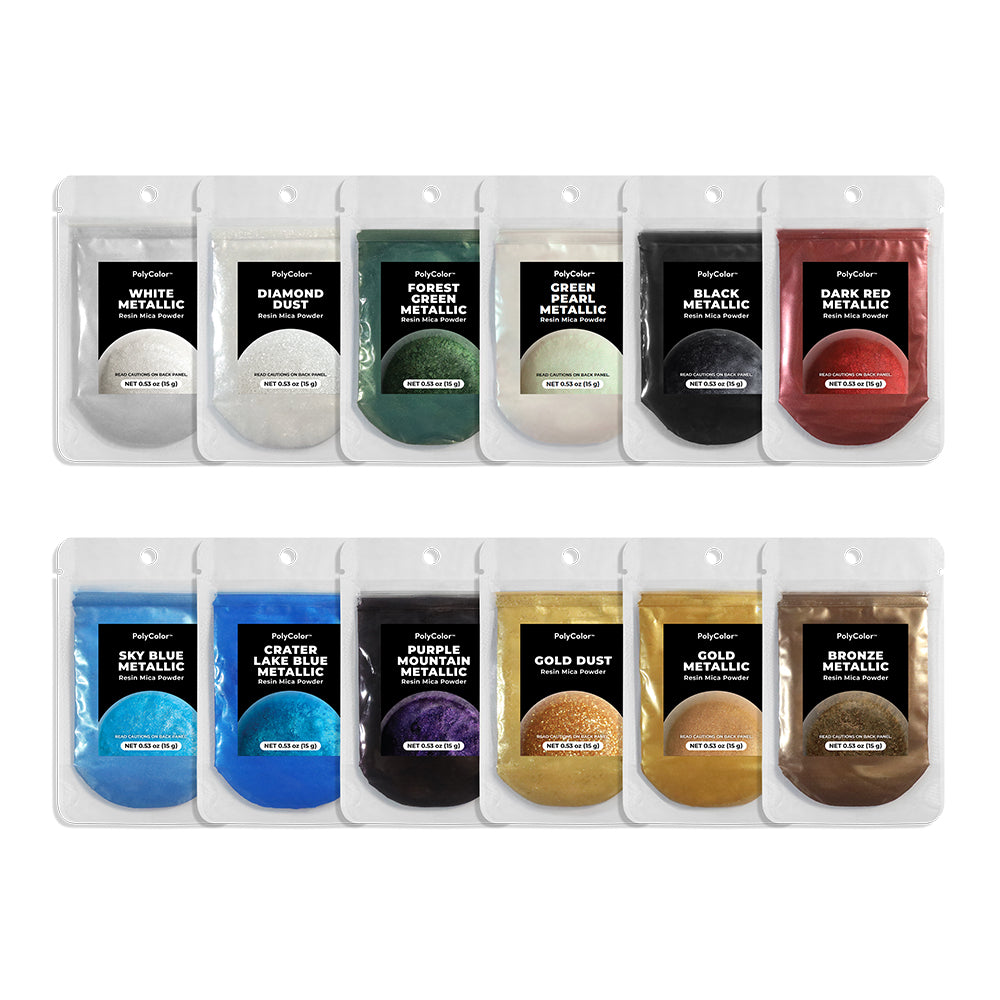
Wipe dust from the surface and edges with 91% isopropyl alcohol and a microfiber cloth. Your foam panels are now prepped and ready for your epoxy finish like your MDF or laminate countertops would be before pouring your marble color coat. Pick up one of Stone Coats designer epoxy kits, or you can create a custom marble finish with your favorite colors.

STEP 6: Pour Epoxy Finish of Your Choice and Protect with the Ultimate Top Coat
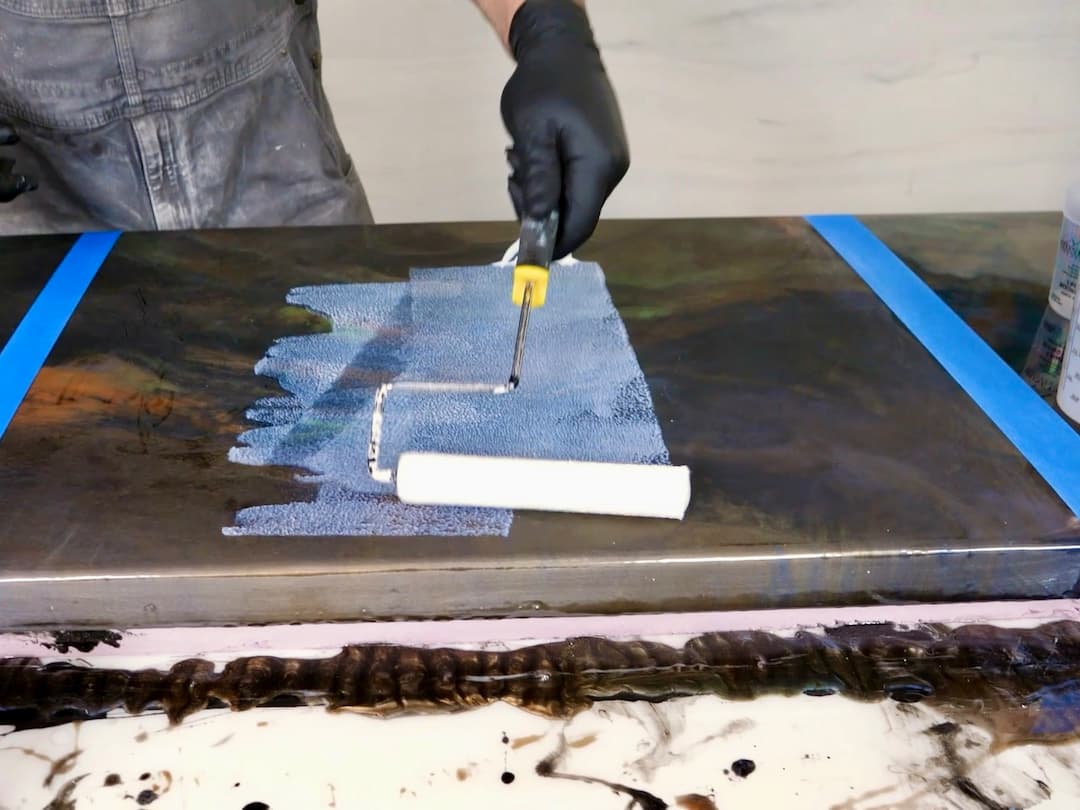
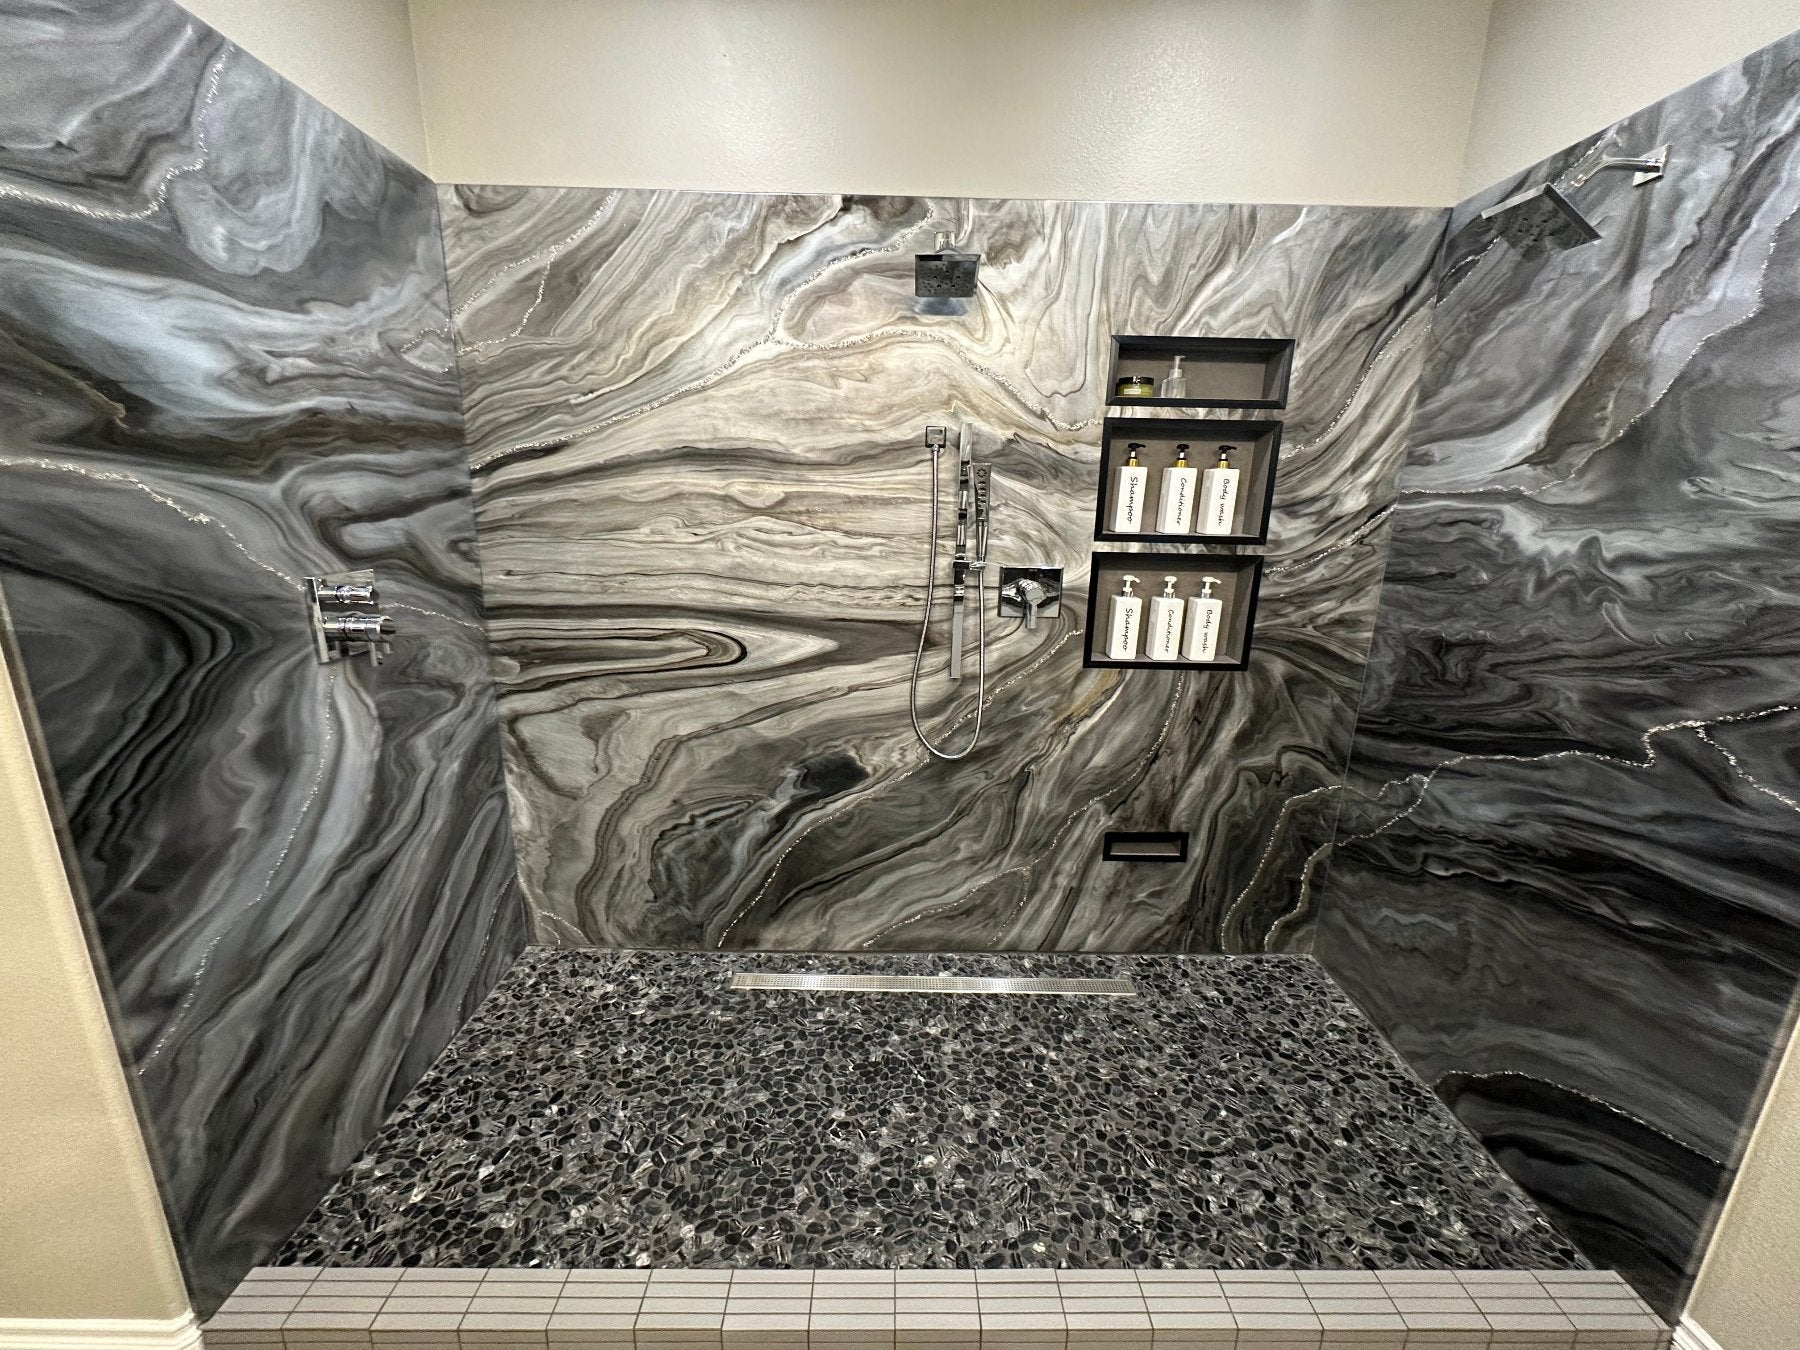
It’s time to transform your bathroom with a custom Stone Coat Epoxy Shower Wall finish! Our easy-to-install, waterproof epoxy shower panels are perfect for a DIY shower renovation that’s both affordable and stylish. With Stone Coat Epoxy products, you can replace a fiberglass shower surround in just one day, achieving a high-end designer look for your shower walls. Our step-by-step epoxy shower wall tutorial on YouTube shows you how to create a unique epoxy shower wall finish at home. Subscribe now for expert tips, tricks, and inspiration, and make your shower renovation project both cost-effective and durable. Use your favorite Stone Coat Epoxy Finish Kit with everything you need or create a custom marble finish with your favorite colors over your freshly prepared foam panels.
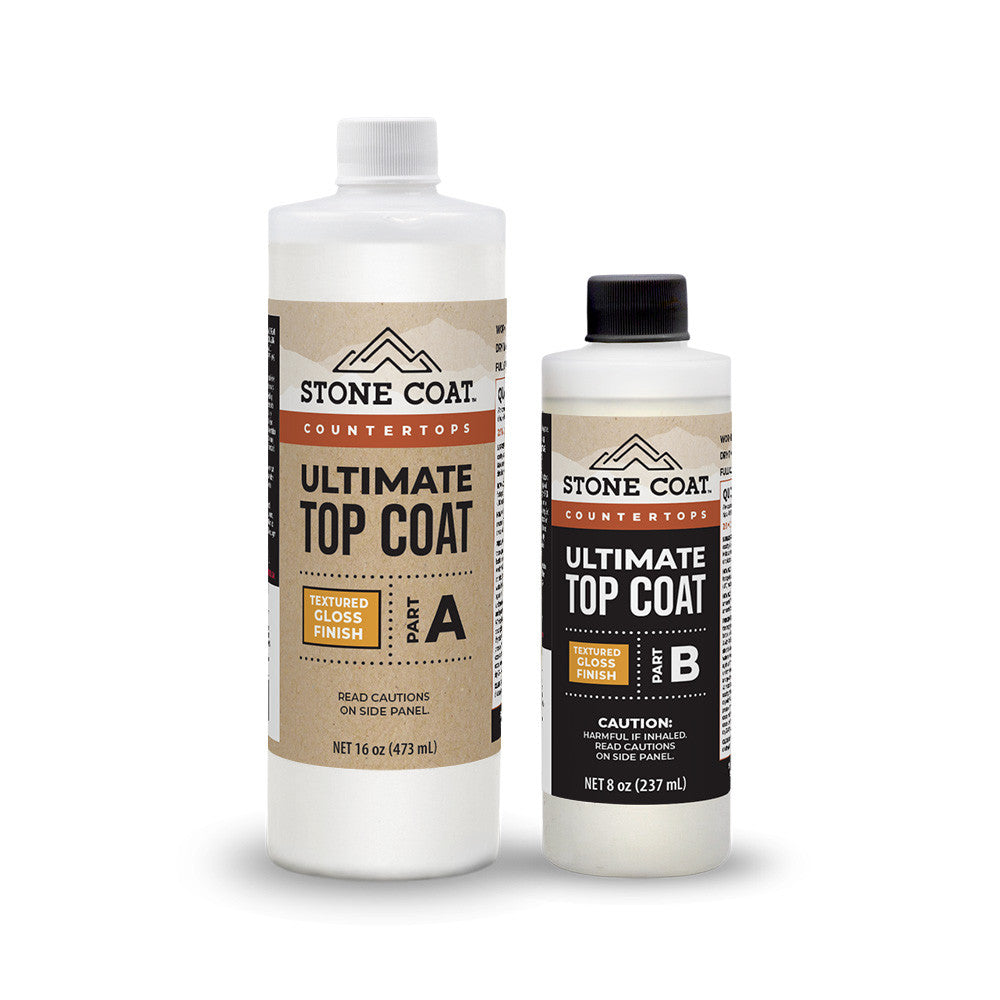
After applying the marble coat and a 3 oz per square foot epoxy clear coat for protection and depth, we recommend using The Ultimate Top Coat (available in Natural or Glossy) as a final protective layer. Let the shower panels cure for 36-48 hours after the Ultimate Top Coat before installation, ensuring a professional-grade, long-lasting finish.
STEP 7: Epoxy Shower Wall Installation
After installing the shower pan and adding cement board or green board sheetrock, apply two layers of roll-on waterproofing membrane to the shower area. This prepares the space for the epoxy shower walls. Follow the manufacturer's instructions for installing and waterproofing the cement or green board, providing extra protection in case any water gets behind the foam panels. While rare, it’s always best to be prepared in wet areas.
Apply 1-2” circles of 100% silicone, about 1-1.5” thick, spaced every 6-10” from top to bottom where the panel will go. Start with the back wall, placing a paint stick or yardstick at the base to keep the panel off the shower pan, preventing water wicking. Remove this spacer once the silicone is dry and before using the shower. Press the epoxy shower panel firmly against the wall, flattening the silicone circles to create suction and secure the panel until it dries overnight. Repeat for the side walls. For fixtures, cut openings with a router bit, hole saw, or multitool. Use foam strips to push the side panels tightly against the wall if needed.
Seal the two inside seams of the shower walls with 100% silicone. For easy cleanup, apply 2” wide blue tape along each side of the seam, leaving a 1/16”–1/8” gap from the seam edge. Overfill the seam with silicone, then smooth it with your finger, wiping excess off with paper towels. Once excess is removed, peel off the tape and make a final pass with a clean finger.
Use paintable latex caulking along the outer edge where the shower panel meets the wall. A damp tile sponge works well for cleaning up any extra latex caulking after smoothing it with your finger.
Allow the silicone to cure for 24 hours before use and remember to remove any spacers under the panels.
Don’t forget…YOU GOT THIS!
More than just countertops
Our ready-to-pour Countertop Kits and Countertop Recipes work perfectly for showers, too.


Carrara Marble Countertop Kit


White Exotic Marble Countertop Kit
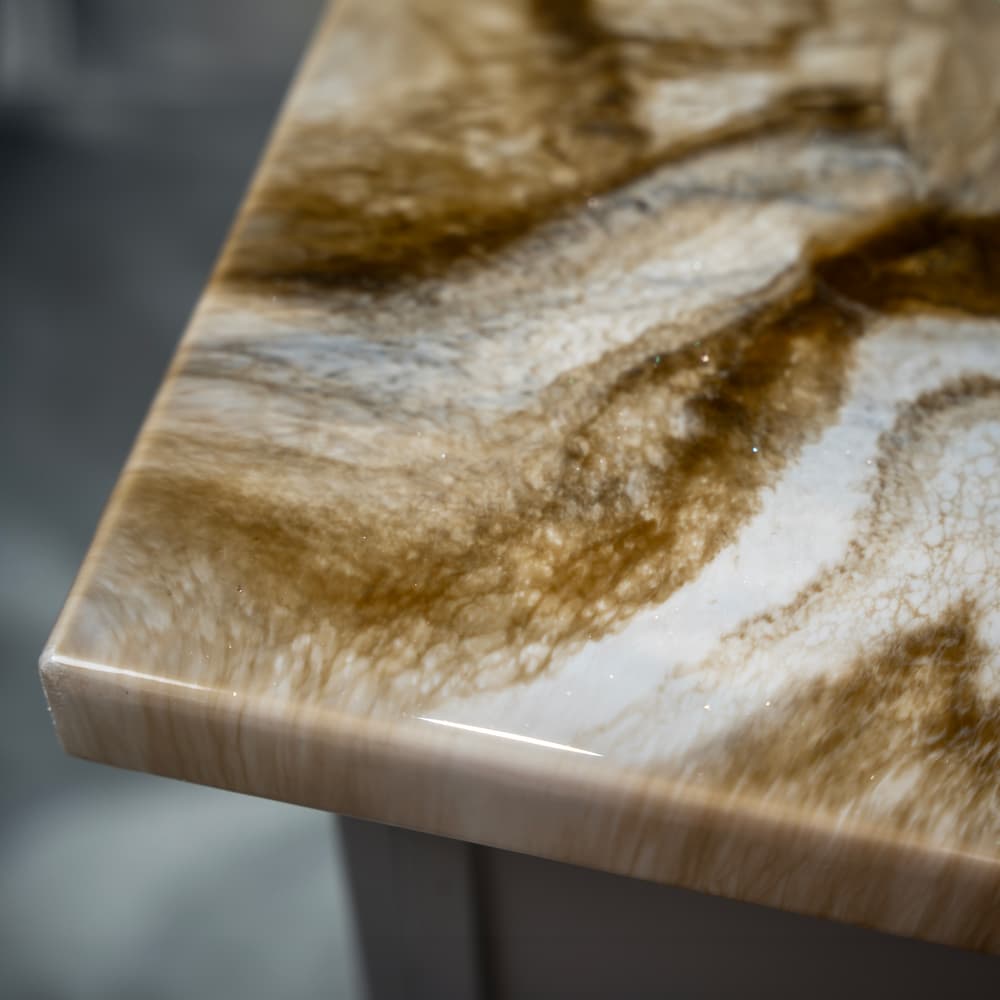
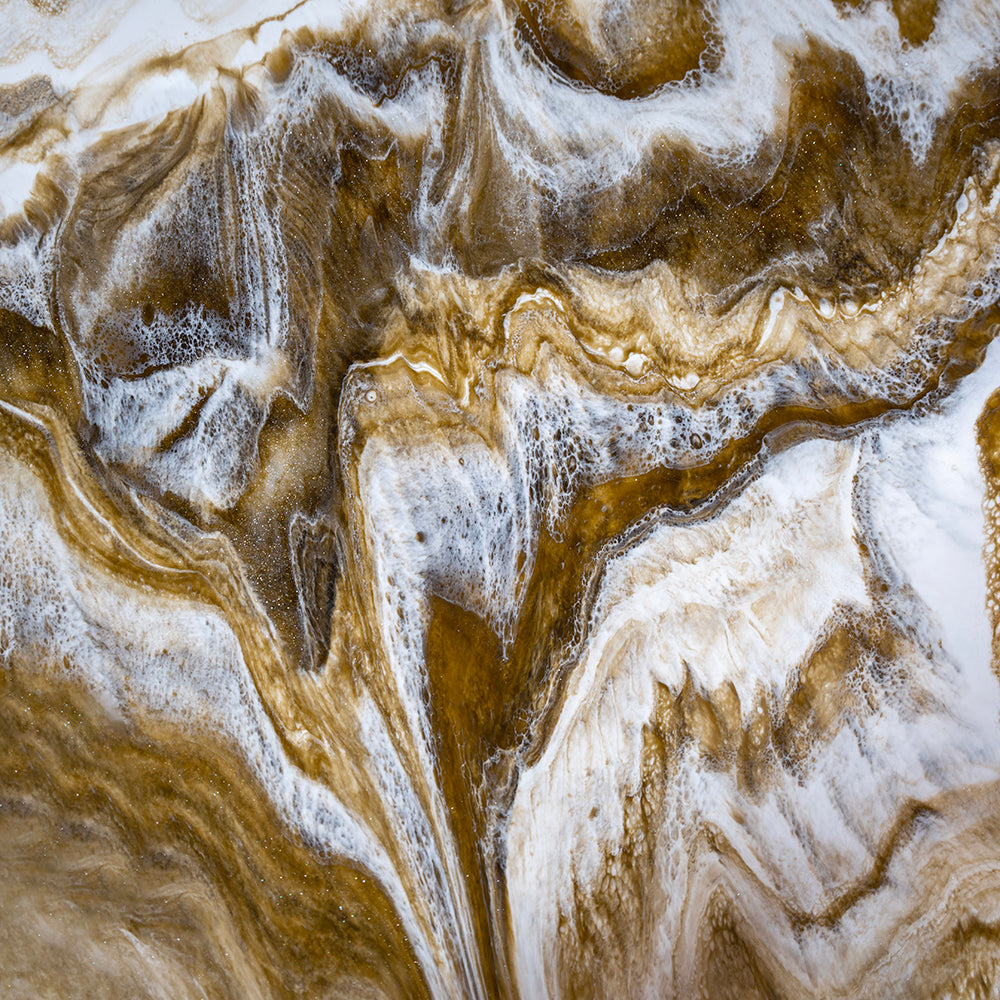
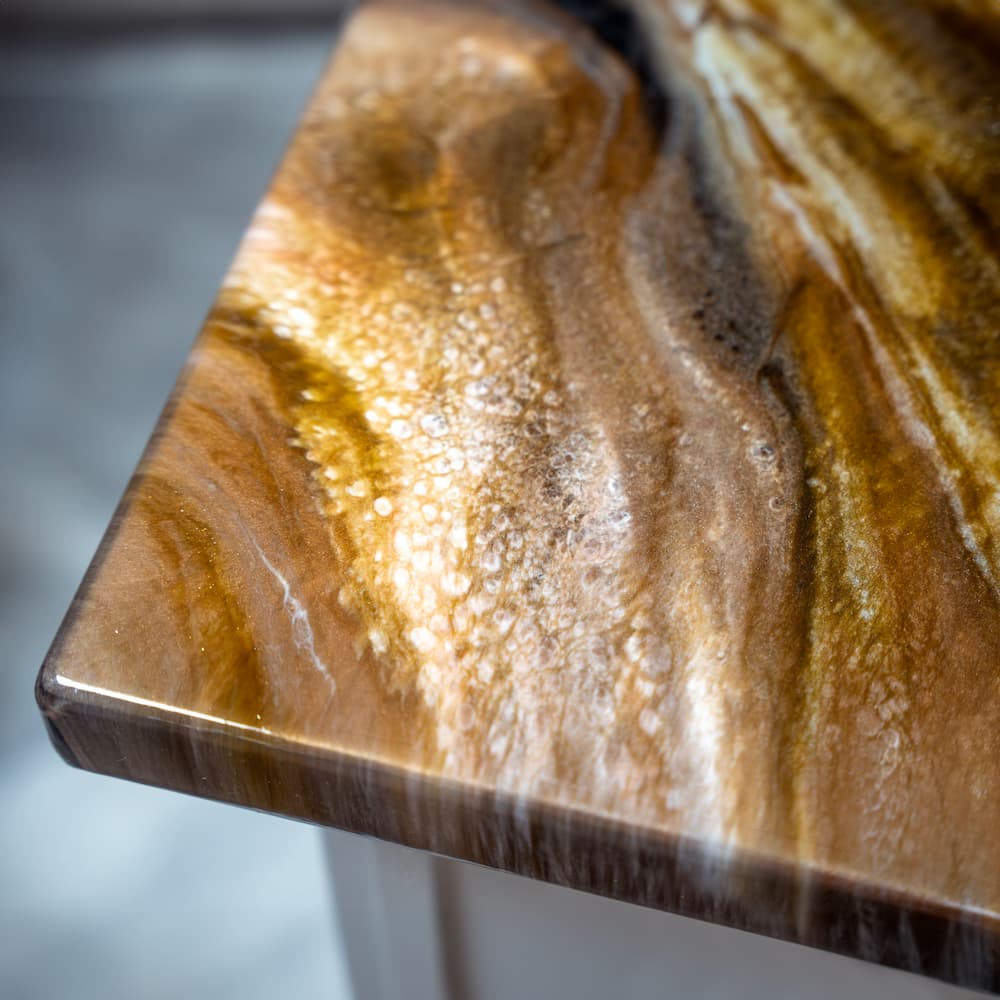
Caramel Marble Epoxy Countertop Kit
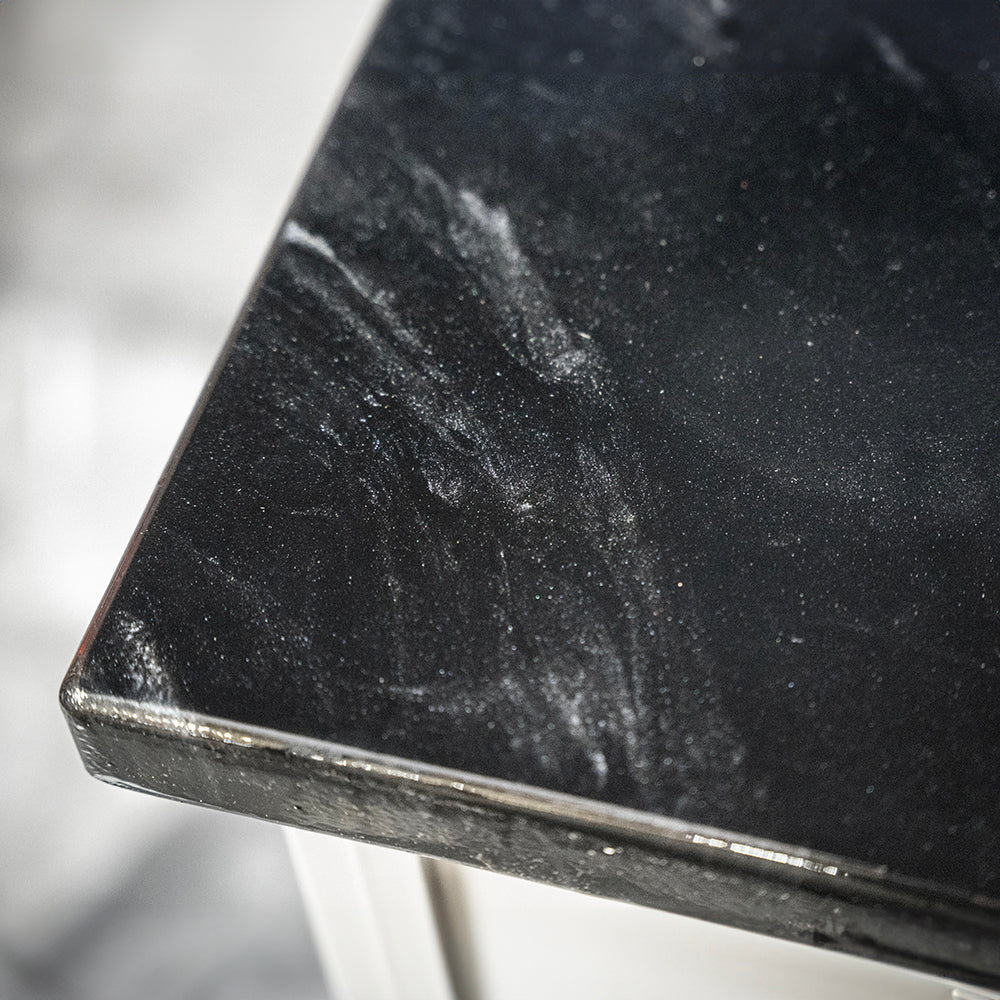

Black Marble Epoxy Countertop Kit
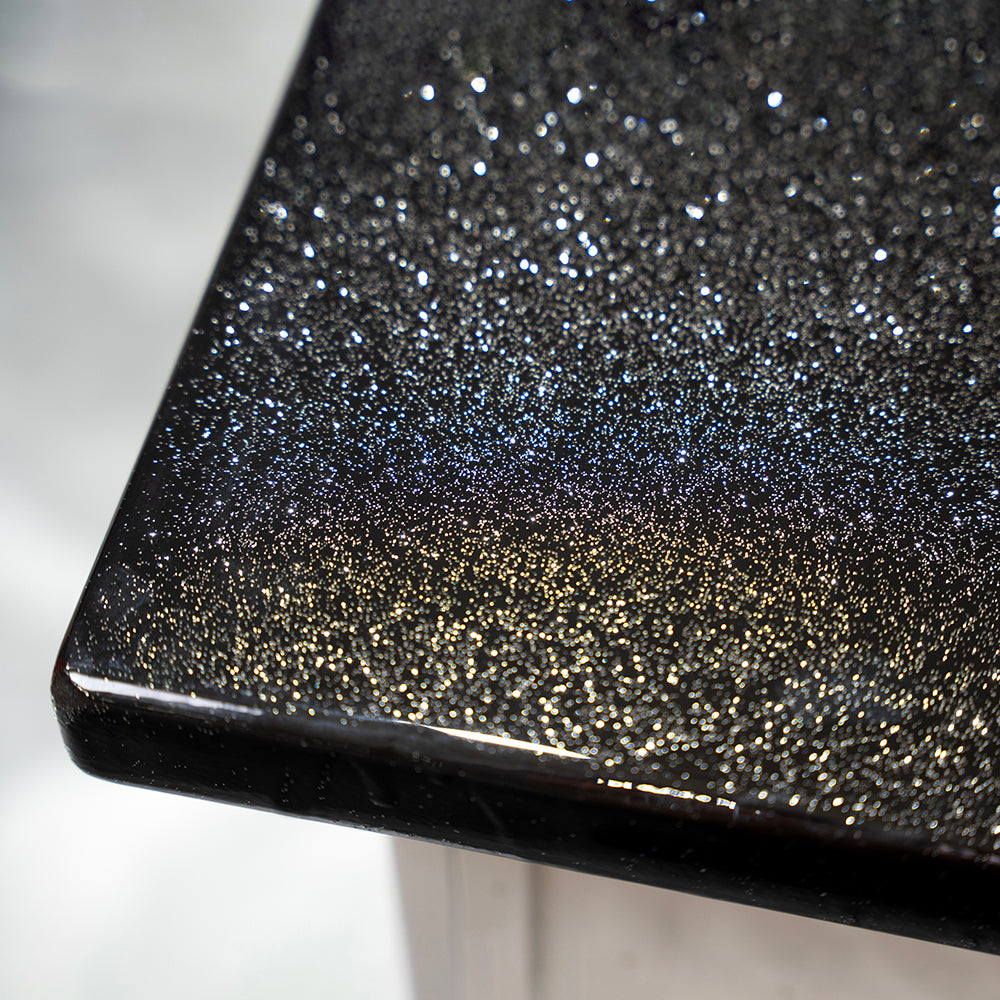
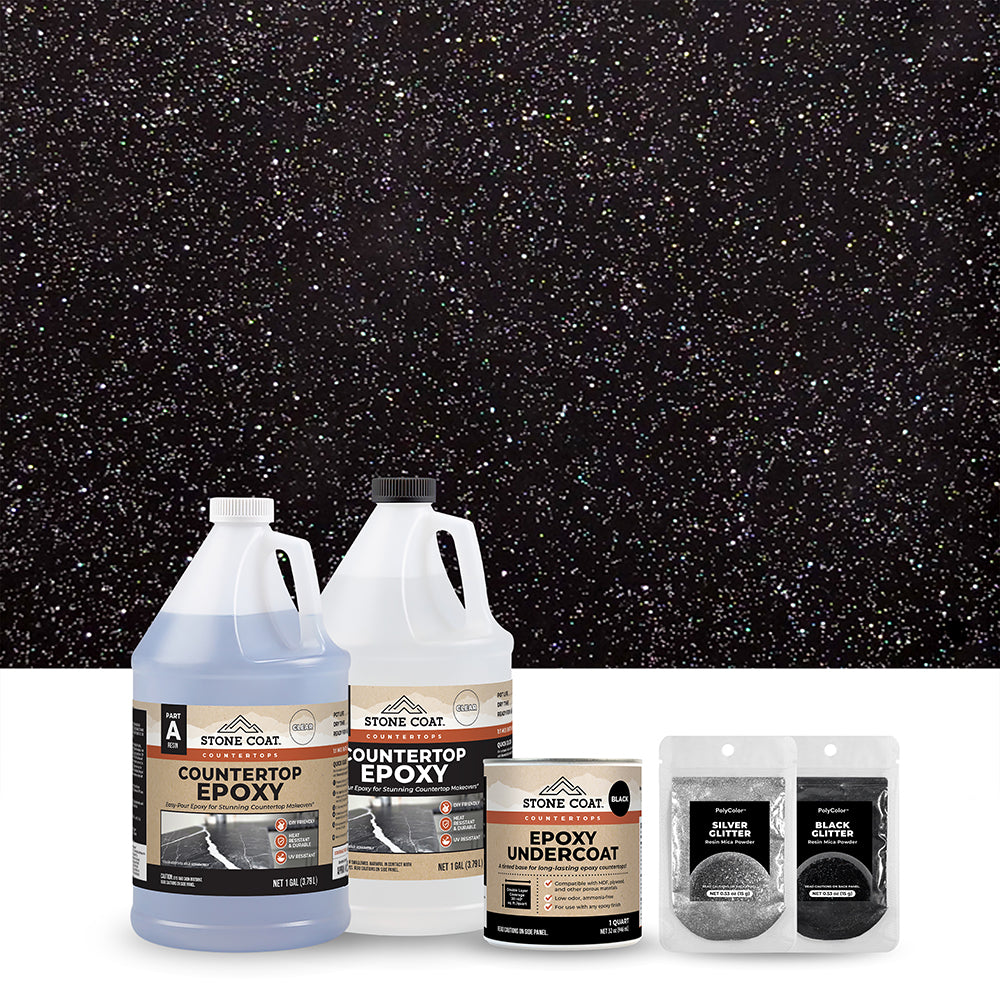
Black Galaxy Glitter Epoxy Countertop Kit

Natural Earth Tones Epoxy Countertop Kit
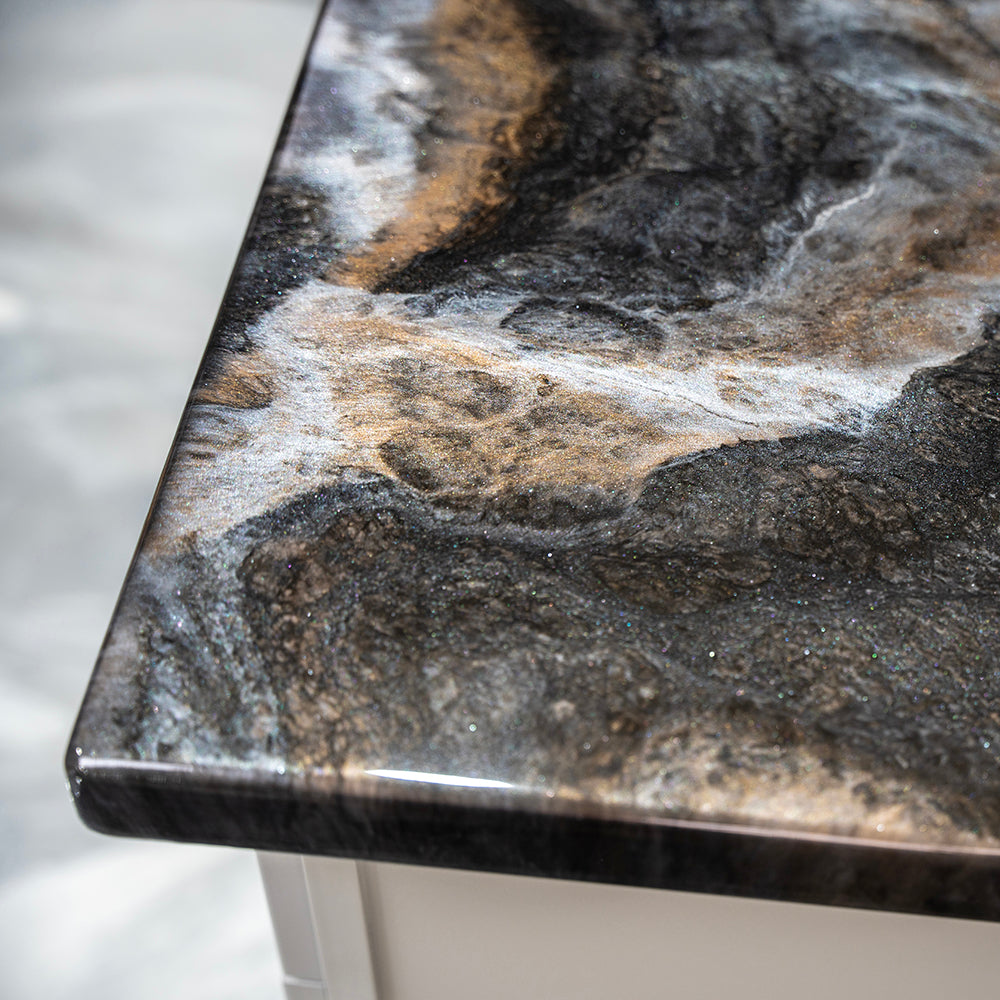
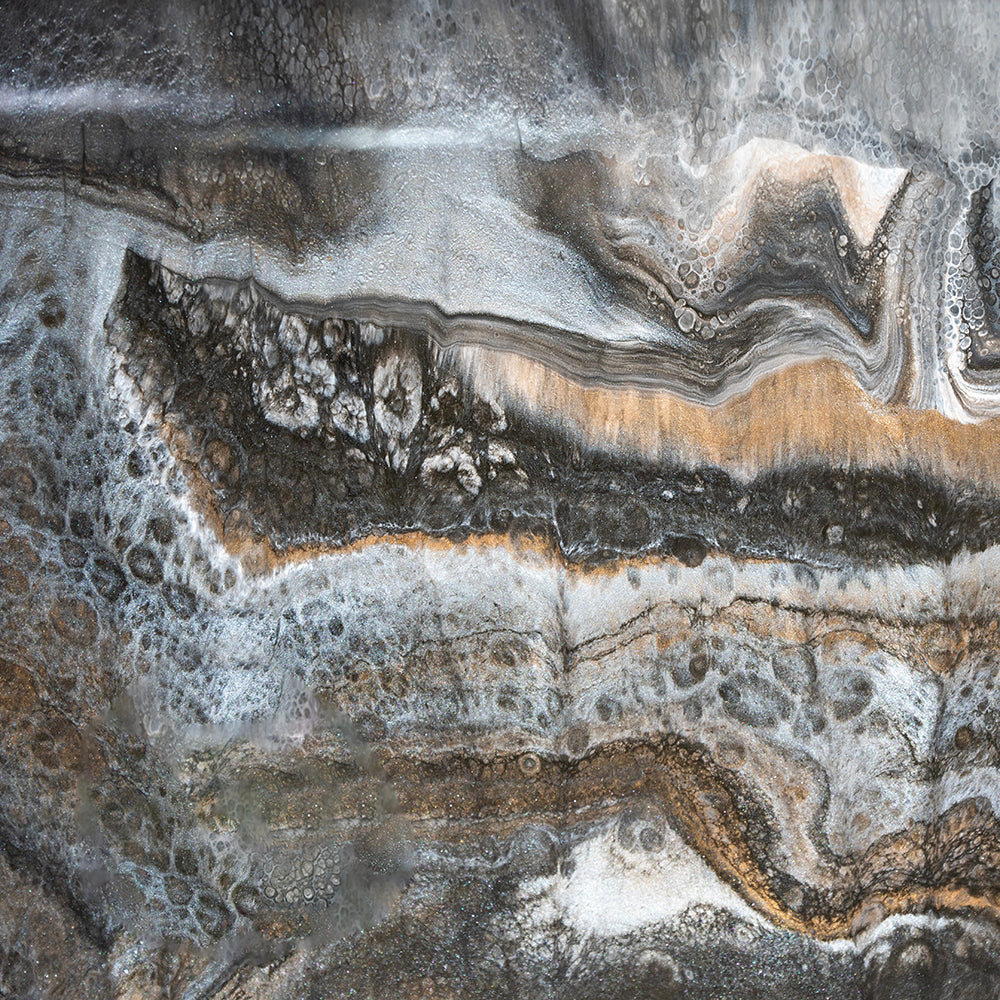
Black Exotic Marble Epoxy Countertop Kit
White Quartz Epoxy Countertop Kit
TRY ONE OF OUR MOST POPULAR color RECIPES

DIY White Exotic Marble Countertops with Epoxy
Learn more
DIY Black Galaxy Glitter Countertops with Epoxy
Learn more
DIY Carrara Countertops
Learn more
DIY Black Exotic Countertops with Epoxy
Learn more
Epoxy Shower Frequently Asked Questions
We’ve heard every question on the planet about epoxy projects. When it comes to shower walls, these are some of the ones we hear the most:
Can you epoxy shower walls?
Can you epoxy shower walls?
Yes! It must be done with premade panels—you can’t slather epoxy on existing shower walls and expect it to work. The process is different from that of epoxy countertops.
Can you epoxy a shower floor?
Can you epoxy a shower floor?
Yes again! Be aware that it can be slippery. You’ll want to add Non-skid additive to the epoxy, or something to help your feet grip when it’s wet.
How do you clean epoxy shower walls?
How do you clean epoxy shower walls?
It’s much easier that cleaning grout, we can tell you that. You can clean with soap and water, or any epoxy cleaning agent you like.
Is epoxy good for bathrooms?
Is epoxy good for bathrooms?
Epoxy is great for bathrooms! If you’re planning to do your shower walls, you might as well do your bathroom countertop, too.
Is epoxy waterproof?
Is epoxy waterproof?
Epoxy is very waterproof. You won’t have to worry about water leaking through your shower walls, floors, or anything else.
Of course, you may have more questions. And we’re happy to answer them! Feel free to drop us a line any time—we’ll try to help you figure out how to make your project succeed.